Posted on Leave a comment

What Fabric Marker to use?

Fabric Markers

What Fabric Marker to use?

There are so many markers out there and they all say they are good in one way or another. So, which one to use? And which one won’t cost me a fortune?

My first marker was a Sewline – a mechanical marker purchased years ago. It has many colors available on lead and marks fine lines plus it looks pretty itself. It went through a lot of projects with me until I took on a big applique quilt. When I used it to draw a long straight line for joining large applique pieces together, it started to scratch my fabric. So I bought my 2nd marker of Cha. Cha water erasable marker has a fine ceramic tip from which ink flows easily without effort and doesn’t bleed. That resolved the issue I had with drawing long lines.

As one of “a compulsive perfectionists” 🙂 , I took on different markers as I came across over the years in the hope of finding the perfect one with which I can settle with. Thus I have some different types of markers. I’m going to share with you my findings on them and hopefully it’s helpful to you.

The number one finding from searching the perfect marker is – no marker is perfect, no marker can do all jobs and fulfills all the purposes and with all good points. In fact I find what makes the marker work is often what could be the reason for the trouble they carry. For example the beautiful Sewline mechanical marker I have, it leaves the marking by being pressed down on the fabric. But pressing down hard may cause the marking not to be removed completely. This is the very reason I couldn’t use it for drawing a long line in a quick stroke which required a harder press and therefore scratched the fabric.

Another example is heat erasable markers – markings disappear with a certain level of heat, but can come back if it’s not been washed and the ait temperature is cold enough. Also if the storage condition is too hot, ink on the tip of the marker may dry which then blocks the ink flow. One of our clients shared that with me. She said even storing it close to a car heater outlet inside her car dried her marker up. So I’d suggest always testing on your fabric before using the marker as all manufactures say, and get the type of marker that suits the project you are working on.

The table I compiled below is based on my own experience and research. I hope it’s helpful for you. However, please feel free to drop a line for discussion 🙂 and I’d love to hear your experiences on markers.
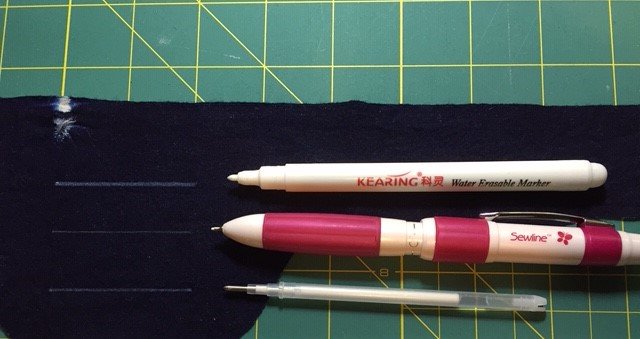
Marking on dark fabric

from top to down – Kearing water erasable marker, Sewline mechanical marker and heat erasable refil –
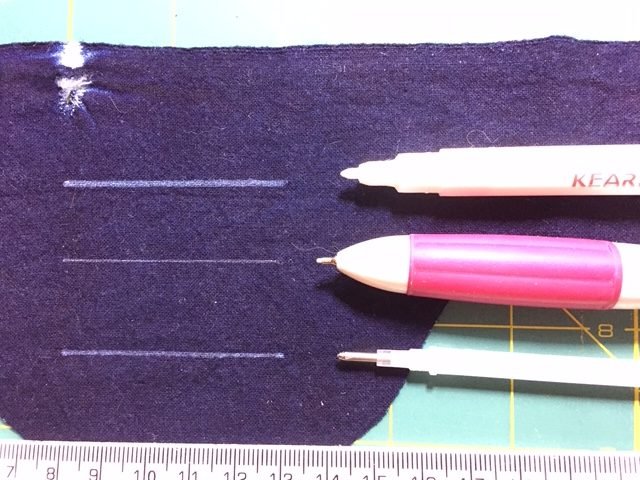
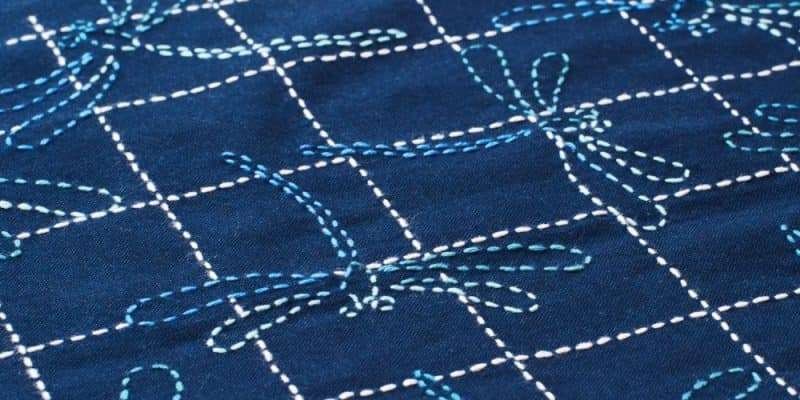
a close-up shows how fine and clear each marking is off 3 different markers
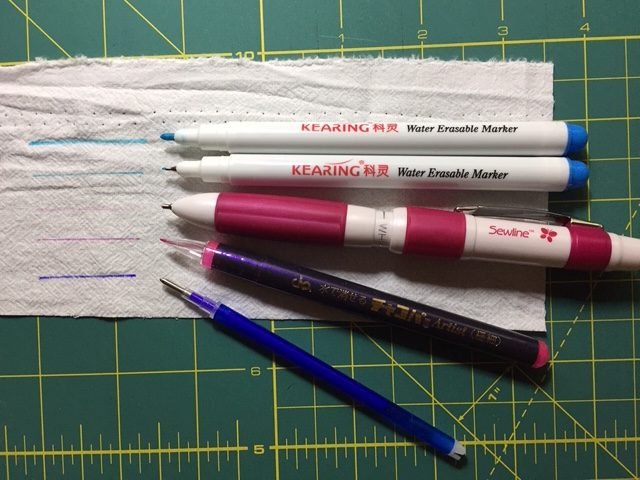
Marking on light fabric

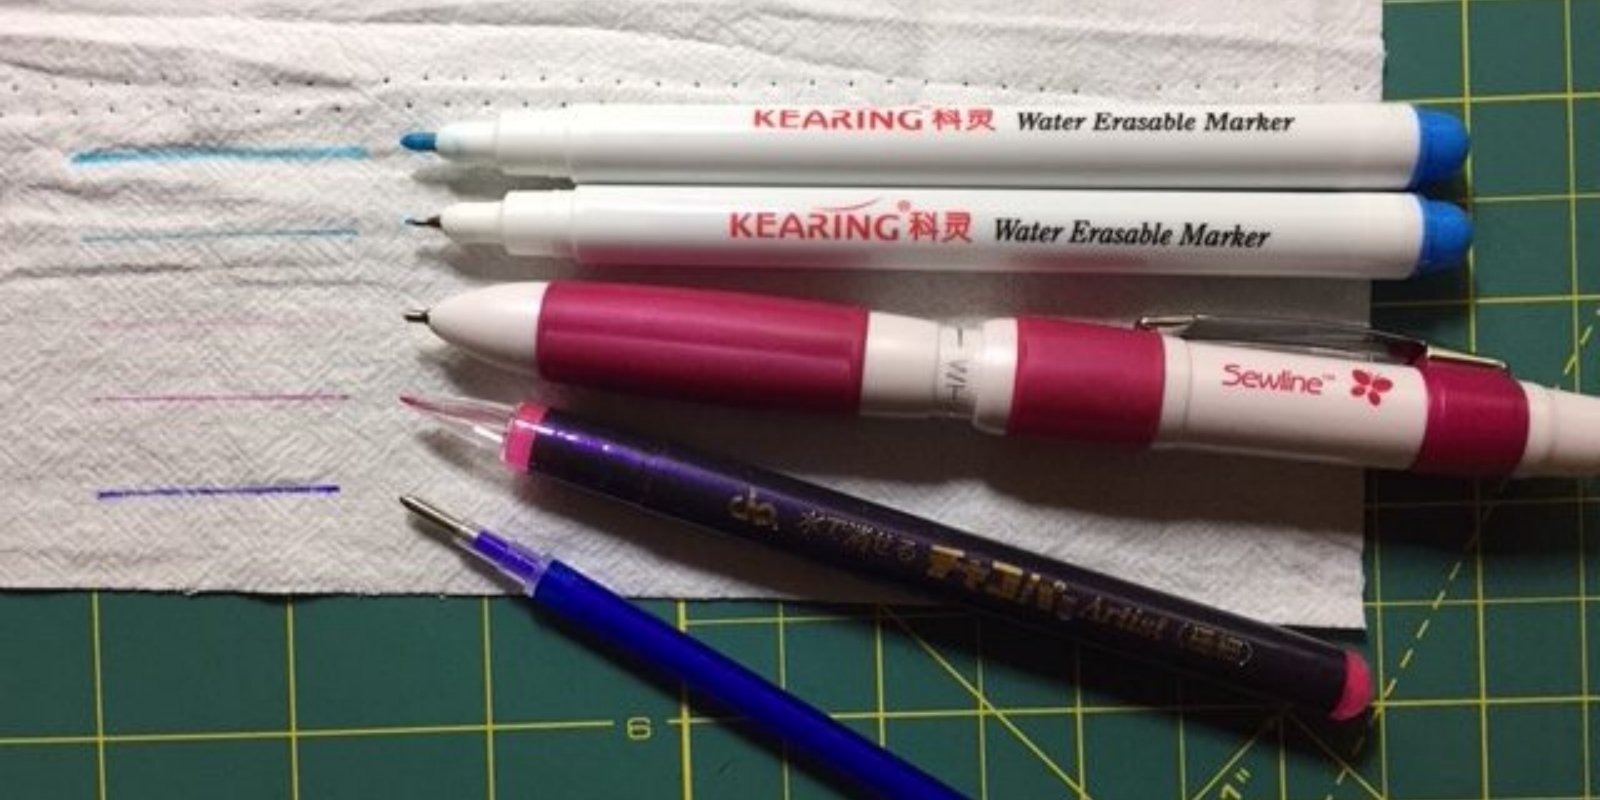
from top to down – Kearing water erasable marker in 1mm tip and 0.5mm tip, Sewline mechanical marker, Cha super fine water erasable marker and heat erasable refill

Type of markermechnical pencillead pencilair erasable markerwater erasable markerheat erasable markerhera marker
mechanism0.9mm ceramic leads coloured with water-soluble dyes. Marking is  removed from most fabrics using the in-built eraser, or by dabbing with a damp cloth or washing.lead leaves markings after drawing on fabricspecially formulated ink leaves marking on fabric through felted tip. Marking disappears without anything done with it. Time of disappearance of marking depends on type of fabric, weave of fabric, room condition etc.specially formulated ink leaves marking on fabric through tip. Marking disappears with damp cloth or after wash.specially formulated ink that is light activated leaves marking on fabric through tip. Marking disappears when ironing over 60 °C or after wash. However if not washed, marking can reappear when temperature is below -8 °C or lower depending on colour of ink.a relatively “sharp” edge slides along fabric leave a pressed mark / crease in fabric.
ProsLead can be refilled. Can be used on light or dark fabric. 0.9mm tip gives relatively fine marking line.cheap and widely availableboth thick head (1mm) and thin (0.5mm) are available. No need to do anyting to remove marking ; marking is clear and bold.Cost is very reasonable if you shop around. marking stays until you remove it. Once washed, no markings left at all, very clean. Various colours available makes it can be used on both dark and light fabric. Both thick (1mm) and thin (0.5mm) are available making it easier for fine stitching project. Ink comes out easily without needing of pressing hard at all. marking is clear and bold. Ink runs smoothly and easily. Both thick (1mm) and thin are available. Very affordable if you are happy with using just big refill (which is like a thin pen). Refills available.no stains left on fabric
ConsMost expensive relatively. Have to press down lightly when marking and have to remove marking before ironing or potentially marking cannot be removed completely. Because pressing down lightly, marking is light and vague, which can be rubbed off when working on fabric for a while. Also though it leaves marking easier than ordinarily pencils, it can still scratch fabric when trying to leave a mark.can scratch fabric; marking usually isn’t fine if using thick lead; markings possibly cannot be erased completely if presed hard or too dark.marking can go before you finish job; time to take for marking disappear varies – depends not only on fabric but also room conditions as well which makes it hard to estimate how long marking would stay without testing; haven’t seen marker on dark fabric.if room moisture is high, marking can fade. On moisture absorbent fabric like linen, marking line is thicker.Because they are light activated there is a slight time delay in their appearance so wait for it.  The brighter the available light in your studio, the shorter the delay. Marking can be rubbed off before you finish work if being rubbed too much; ink is very heat sensitive and tends to get dried out if room condition is too hot or left aside for too long after use.marking is essentially a fold on fabrics so it’s hard to see and if left too long, have to re-mark the fabric you work on
suitable forall-rounder marker but not suitable for projects needs long marking lines or very textured fabric.projects that can have marking covered when finished and don’t need long marking lines.projects need marking stays for only a short time.embroidery projects. My favorite type 🙂Projects need very clear markings and don’t want to be washed afterwards and won’t go to places below freezing point.quilting purpose, applique
Brand testedsewlineany student pencilAdgerKearing, Cha Cloverclover
priceapprox. $20/pencilmostly less than $1/pencilapprox. $6/markerfrom $4.5 /marker onward depends on which marker you choose and which shop you go toapprox $10.5/markerapprox $10/marker

For your convenience, markers are available via the link provided below. Blue markers are suitable for most fabric types, while brown markers are recommended for blue or grey fabrics.
“You can find Fabric markers here”

Posted on Leave a comment

Sashiko pattern – Hemp Leaf (Asa-no-ha)

Sashiko pattern – Hemp Leaf (Asa-no-ha)

A popular pattern in common use

Among the traditional patterns which have been most popular among Japanese over the years, one stands out: Asa-no-ha, or the hemp leaf pattern.

Even the common man with no interest in fabric design or patterns is sure to recognize this shape, although he may not know its name or history. If asked where he had seen it, he would probably find it difficult to respond clearly, conjecturing that “perhaps it was the pattern on the wooden box I has when I was small.” This pattern has become so much a part of everyday life as usually to go unnoticed by Japanese.

There are two popular theories about the origin of this pattern. One school of thought insists that the Asa-no-ha is purely Japanese; the other claims that it was introduced to Japan from India via China. While neither theory can be confirmed, it’s clear that the Asa-no-ha pattern began to figure in Japanese art during the Heian period (794-1192 AD). It was then found on fabric used to clothe images of Buddha and in Buddhist paintings; later it was incorporated into building décor.

To some Japanese craftsmen, the Asa-no-ha’s repeating pattern of spokes radiating from a central white hub presents an impression of light and the radiating power of Buddha. Whether used alone or repeated, however, this is a very useful pattern for those involved in design, as it can be used in varying sizes and with spaces of nearly any size.

Although the Asa-no-ha pattern was originally associated with religious applications, it gained wide acceptance among common people in the Edo  period, when the influence of popular – rather than aristocratic – culture reached its zenith.

Hemp has been cultivated since ancient times. Before the Muromachi period when cotton was first imported as its later popularization in the Edo period, hemp was the most common raw materials for making clothes. The Asa-no-ha gained its name for its resemblance to the leaf of the hemp plant.

As hemp is a strong, fast-growing plant, the Asa-no-ha pattern was traditionally favored for babies’ diapers and bedclothes to reflect the hope that one’s baby would grow as strong as hemp. The Asa-no-ha pattern was also a favorite for “Sashiko” work, since the pattern looked most attractive when displayed on cotton dyed in indigo and sewn in layers.

Hemp Leaf pattern in costume

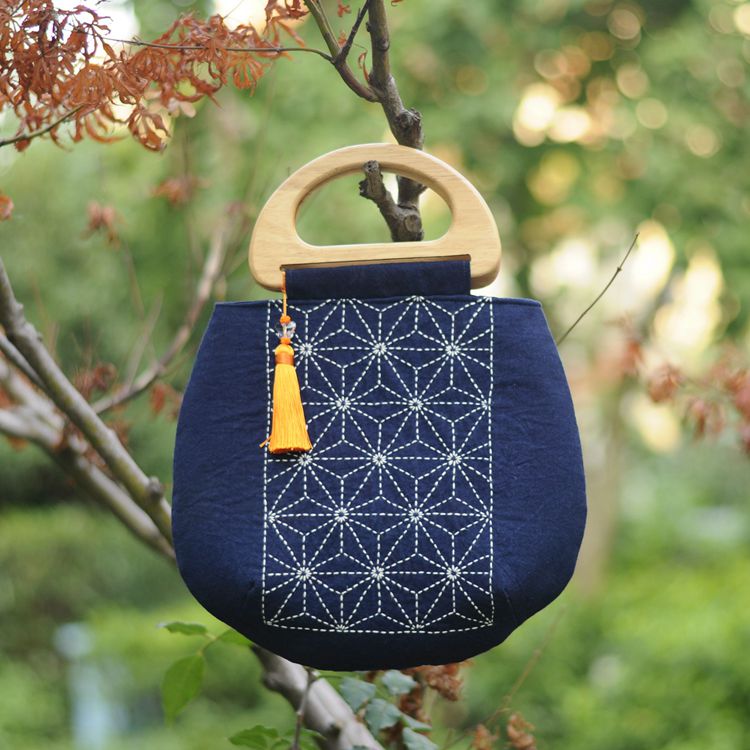
This Sashiko hand bag has hemp leaf pattern centered to both front and back of bag. Simple yet effective. https://affordable-kind-craft.com.au/product/hemp-leaf-handbag

This Good Luck Sashiko handbag has floral pattern formed by those “negative space” that is not stitched by a variation on hemp leaf pattern. A picture can only be recognized after many hemp leaf patterns are done. https://affordable-kind-craft.com.au/product/good-luck-handbag/

Have you had any projects made with hemp leaf pattern or any works you’ve seen in this pattern? Would love to see if you have any 🙂

This article is extracted from Sashiko Blue and White Quilt Art of Japan by Kazuko Mende and Reiko Morishige.

Posted on Leave a comment

Japanese Sashiko Motifs

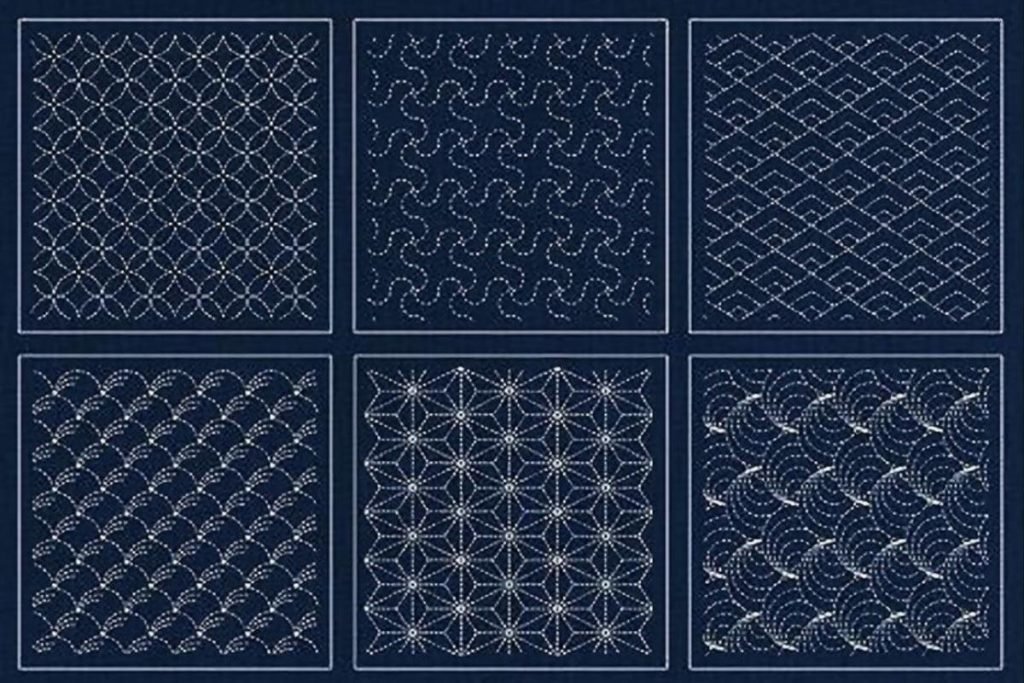
Japanese Sashiko Pattern

Japanese Sashiko Motifs

Japanese Sashiko Motifs reflect Japan’s rich cultural heritage, emphasizing ornamentation and intricate design. They serve as a visual language conveying values, stories, and aesthetic sensibilities, transcending mere decoration. Infused with symbolism, these meticulously crafted figures adorn various objects, from clothing to household items, embodying the interconnectedness of art, culture, and daily life.

Central to Japanese embroidery is the belief that ornaments are integrated into a larger context, filling spaces with beauty and meaning. From simple geometric designs to elaborate motifs inspired by nature or mythology, these patterns reflect humanity’s impulse to create and embellish, addressing the fear of emptiness.

Woven with influences from indigenous traditions, religion, and neighboring cultures, the history of Japanese embroidery patterns spans centuries. They evolve over time, adapting to changing tastes and societal values while retaining timeless appeal. These patterns encapsulate Japanese culture, bridging past and present, and inspiring global audiences with their beauty and significance.

The term “ornamentation” refers to figures and patterns intended to beautify objects.

Ornaments never stand on their own. They always rely on a foundation. Ornamentation is said to be a solution to man’s intrinsic fear of emptiness and his need to fill vacuums. Thus man has valued ornamentation since primitive times, and has employed decorative patterns which reflect the tastes and values of the day.

Traditional Clover pattern

The majority of figures and patterns are simplified representations of human perspectives on nature and the world, structured and organized within defined parameters. Within Japanese designs, there exists a diverse array of patterns, some modeled on real objects while others symbolize natural occurrences.

little-stabs
Seven Treasures Sashiko Pattern

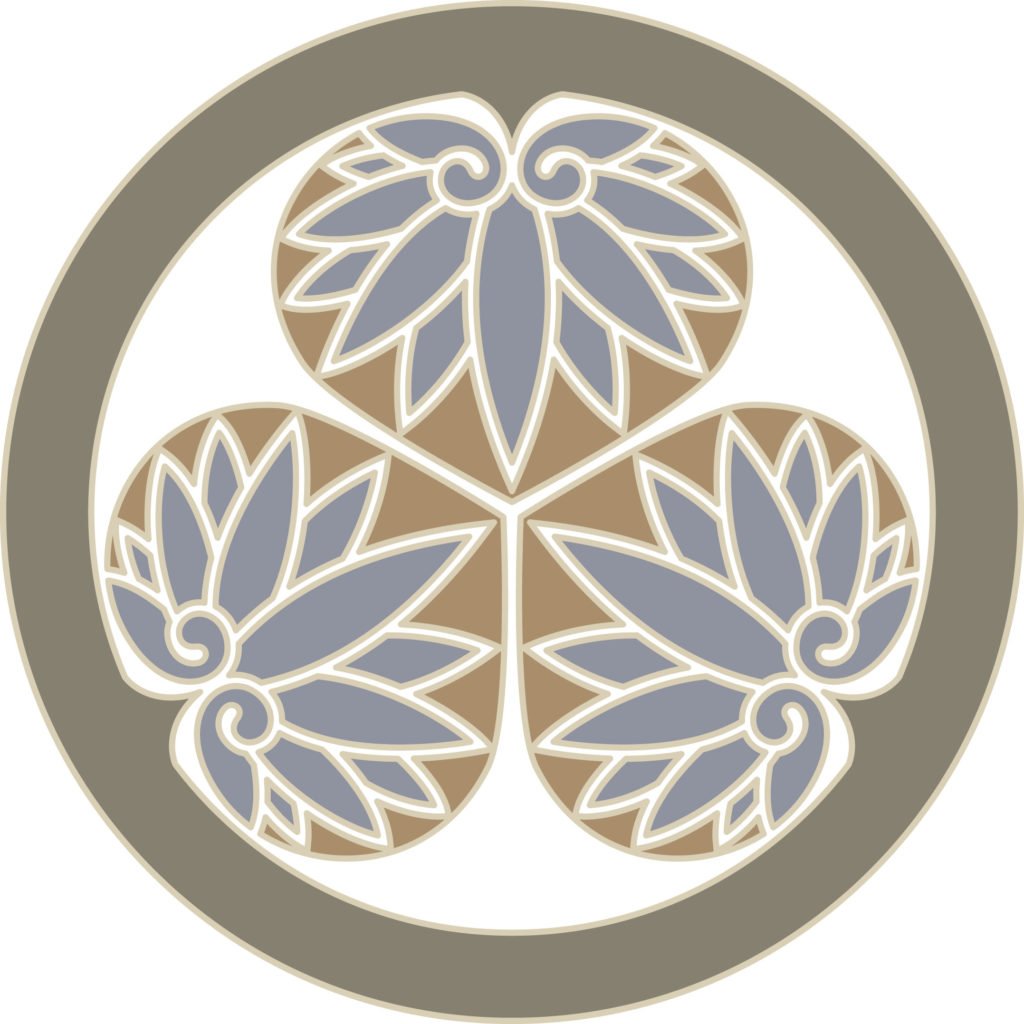
Family Crest of Tokugawa (3 inward-pointing, circularly enclosed hollyhock leaves)

Traditional Japanese Sashiko Pattern

Sashiko Blue and White Quilt Art of Japan by Kazuko Mende and Reiko Morishige.

Posted on Leave a comment

Indigo and Sashiko

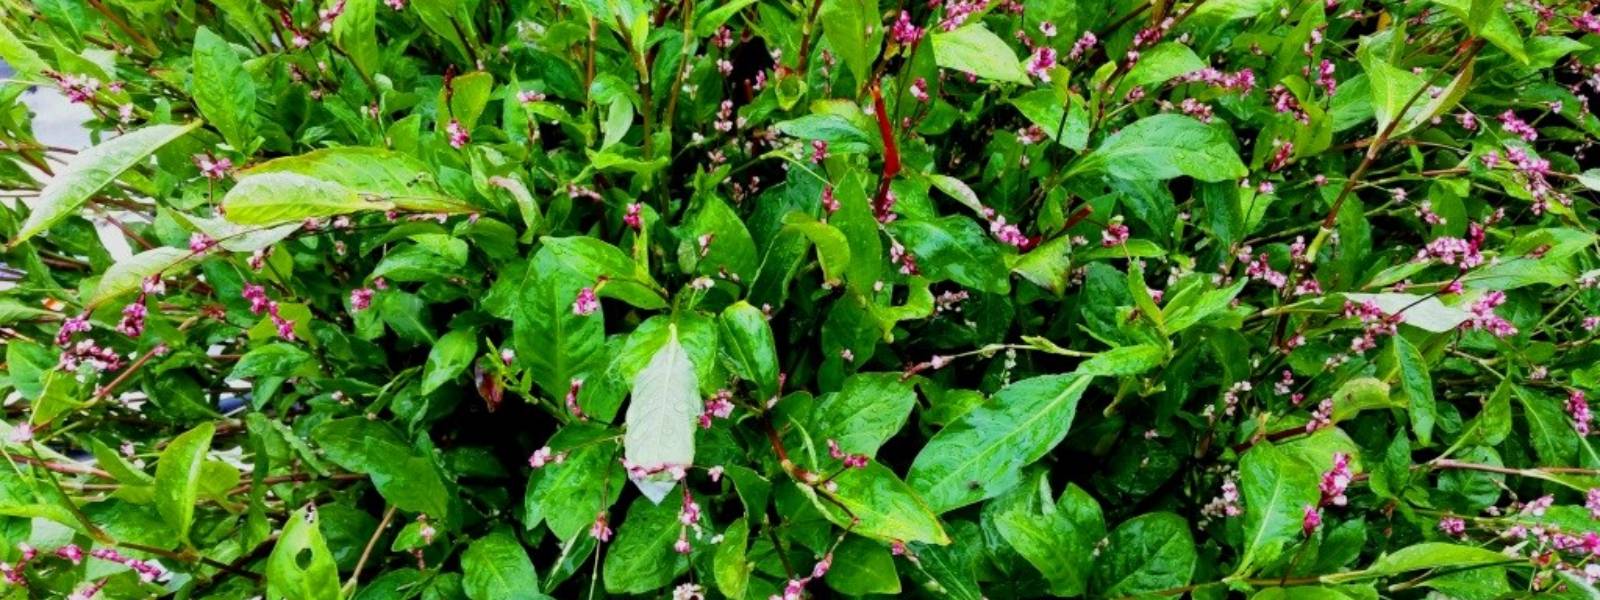
Japanese Indigo Plants

Indigo and Sashiko

The word “Indigo” in Japanese evokes special feelings – of both fondness and nostalgia – among many Japanese people.

Indigo is actually the name of a plant. First introduced to Japan from ancient Egypt via China at around the 3rd century A.D., it has been cultivated as a source of dye since then. Cotton dyed in indigo is strong, warm in winter, cool in summer and rarely moth-eaten. Cotton dyed indigo fabric became popular throughout Japan during the Edo period (1603 – 1867). But while the dyed fabric itself needed little care initially, extracting the dye from plant was quite a troublesome and time consuming task. And it took more effort than for other natural dyes to keep indigo in usable condition.

The life cycle of indigo dye is said to resemble that of a human being.

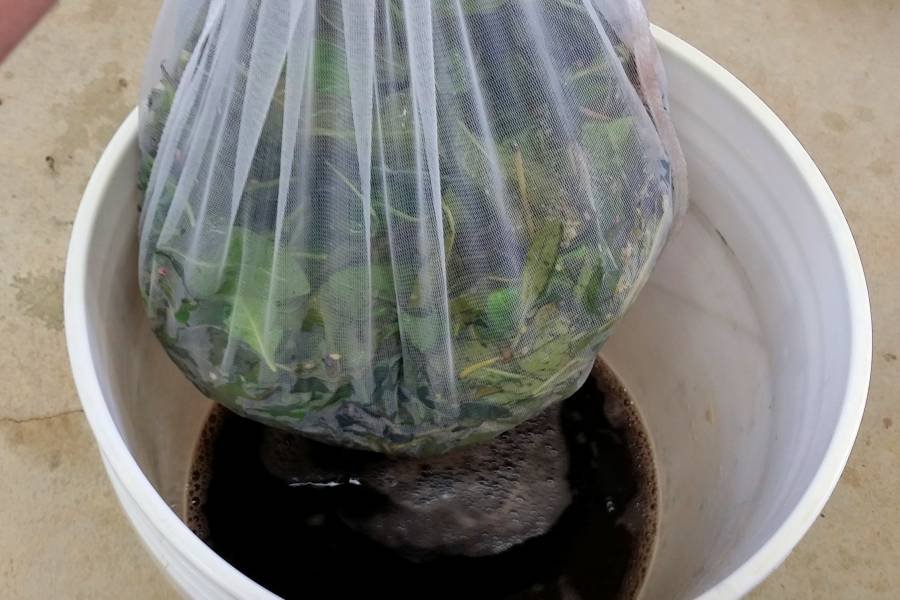
Indigo processing
Soaked indigo leaves are strained though a nylon mesh bag

In the beginning, indigo in a pot is pale in color. As it matures, it becomes darker in color until it ends its life as a dye. Like man, indigo is born, grows, matures and ages. In fact, according to a Japanese saying, nursing a pot of indigo is as difficult as bringing up a child. Although today our work is made easier by the existence of chemical dyes colored indigo, the dye extracted from the indigo plant is still highly valued.

sashiko denim
Sashiko Embroidered Shirt

The pattern craft called “sashiko” was originally employed to make sturdy, warm work-clothes. In order to clothe their husbands in outfits that were both warm and strong, the wives of farmers and fishermen sewed together two or more pieces of fabric and lovingly adorned them with original designs. These patterns were passed on to later generations and their use eventually spread throughout Japan.

Using such traditional materials as indigo-dyed cloth and through the use of the simple technique of sashiko, we have fashioned artistic works which suit contemporary lifestyle.


This article is extracted from Sashiko Blue and White Quilt Art of Japan by Kazuko Mende and Reiko Morishige.

Posted on Leave a comment

Indigo Hand Dyed Fabrics, Care Tips and Handling

Shibori Fabrics

Indigo Hand Dyed Fabrics, Care Tips and Handling

Indigo Hand Dyed Fabrics, Care Tips and Handling

Natural indigo hand dyed fabrics will not shrink like machine dyed fabric because it has already gone through water during the dyeing process, so the length won’t change while washing.

No Chemicals are used in dyeing process.

Apart from variation of color in displays (picture taking, computer screen, phone screen etc), Hand dyed fabric has slight color variation from bolt to bolt and from meter to meter. The piece you buy will resemble what is shown here but will be unique and wonderful.

Washing

Generally, natural plant dye is not as strong as synthetic dye to bond into the fiber of fabrics. Even so, natural indigo is one of the stronger dyes among plant dyes.

Indigo Hand Dyed Fabrics detergent

The experience gained in the dyeing process shows that a stronger reduction in the indigo vat will give a better result in color fastness and a brighter color shade.

As a result, the dyeing artisans have to keep their eyes on the bacteria’s activity and state in the indigo vat to get the fine color and to prevent discoloration of the fabric

After the dye process is done, Fabrics are rinsed gently several times with an Eco friendly textile detergent to remove the indigo which did not bond properly into fibers and to prevent discoloration as little as possible.

However, we recommend our products to be washed by hand with lukewarm water and small amount of detergent to last.

If you want to use a washing machine that’s fine, but please set it at the most gentle and shortest running time mode.

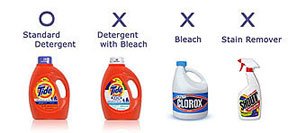
After washing, the fabric should dry outside in a shady place. Tumble dryers are not recommended to because of unnecessary damage and rubbing of the fabric. Please do not use any kind of bleach or stain remover at anytime.

Colors may bleed in during the first few washes: You may wish to soak fabric in water with salt or vinegar for half an hour before the first wash. Always test first !

Indigo-dyed fabrics may lighten over time, just like denim

After handling natural indigo hand dyed fabric, your hands may pick up some excessive dyes. You may want to wash the fabric before use. But in any case, the dye is completely harmless.

Yellowish stains

You may notice some yellowish stains on a new piece of fabric. Don’t worry; the stains will wash out easily, and if you see it, it’s more proof of natural indigo dye too.

You may notice some yellowish stains at the border of Shibori pattern sometimes. That are impurities contained in indigo solution. Usually this can be seen right after the fabric was dyed or when we store it in a closet for a long time. Don’t worry; the stains will wash out easily and should you see it, it’s more proof of the natural indigo dye too.

The Hand dyeing process requires many checks and adjustments. A hook is used to lift the bolt of fabric so no bacteria from hands being introduced into the dye vat to maintain the quality of dye. However this does make small holes on the selvage of the fabric every now and then. This has no impact of the quality of the fabric as the selvage is cut off before use anyway. And again, this is another proof of hand dyed fabric.

Hand dyeing with natural plant dye is an ancient and complicated process. It involves plants being boiled and fermented giving the plant dyed fabric its own unique subtle fragrance.

Finally, would you like to share your experience in using natural indigo dyed fabric with us?