It’s exciting to start blogging again after five years since the pandemic began.
Last week, I went to a camp with a bunch of people who love quilting.
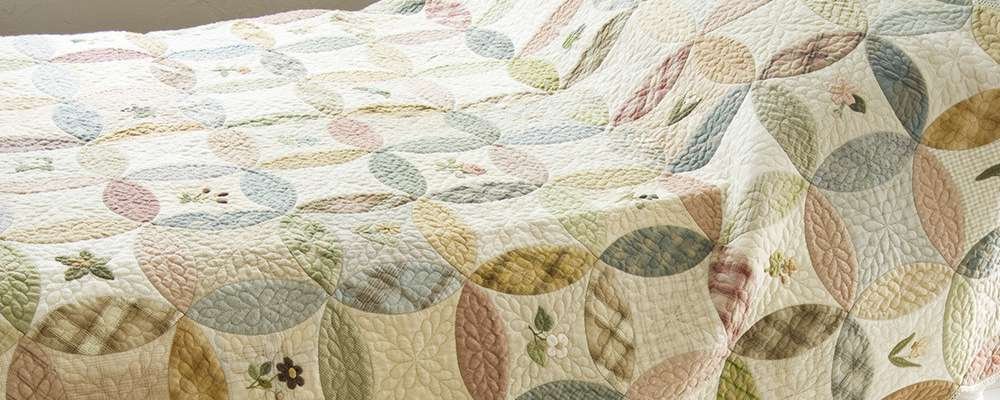
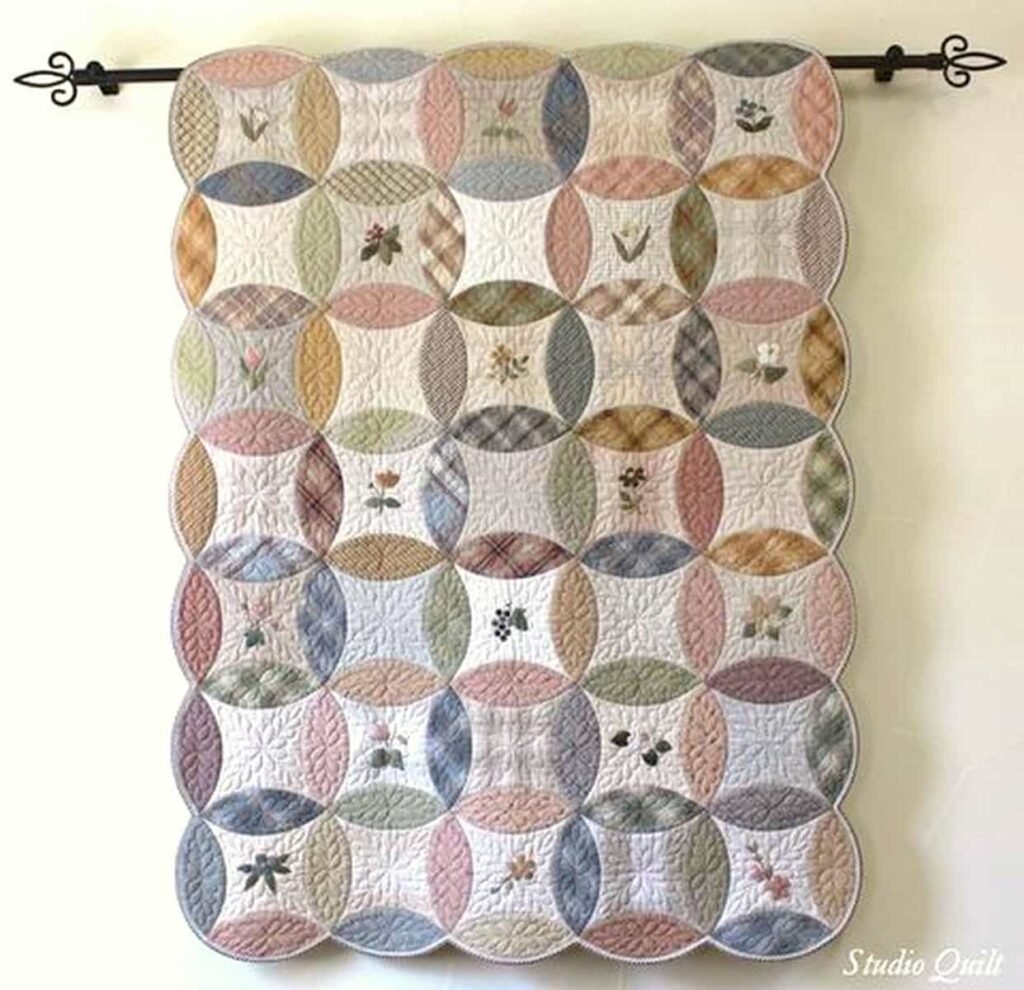
One thing (well it turned out to be the only project I spent time on) I worked on at the camp was a quilt design released in 2014 by Hiromi Hara. She is well known worldwide for using Japanese yarn-dyed fabrics in her patchworks.
The pattern was later published in her book. I pasted a pic of the book on the left
“The quilt looks like the one below. Of course, these pictures are hers. I will share mine in future blogs
“Embarking on a Quilting and Patchwork Journey”
I like this quilt because its color brings a sense of warmth and calm, and the pattern is similar to the seven-treasures pattern that is favored by me. My partner also approved of it with a comment, ‘As long as there aren’t too many flowers on it’. 🙂
Some quilters call it the wedding ring pattern, but it’s different. If you know the name of this pattern, please let me know.
The quilt in the pic is only 1m x 1.37m. I’m going to make one that will be around 1.9m x 2.2m which will fit my bed. This requires 120 blocks to be made. 12 rows in total and each has 10 blocks.
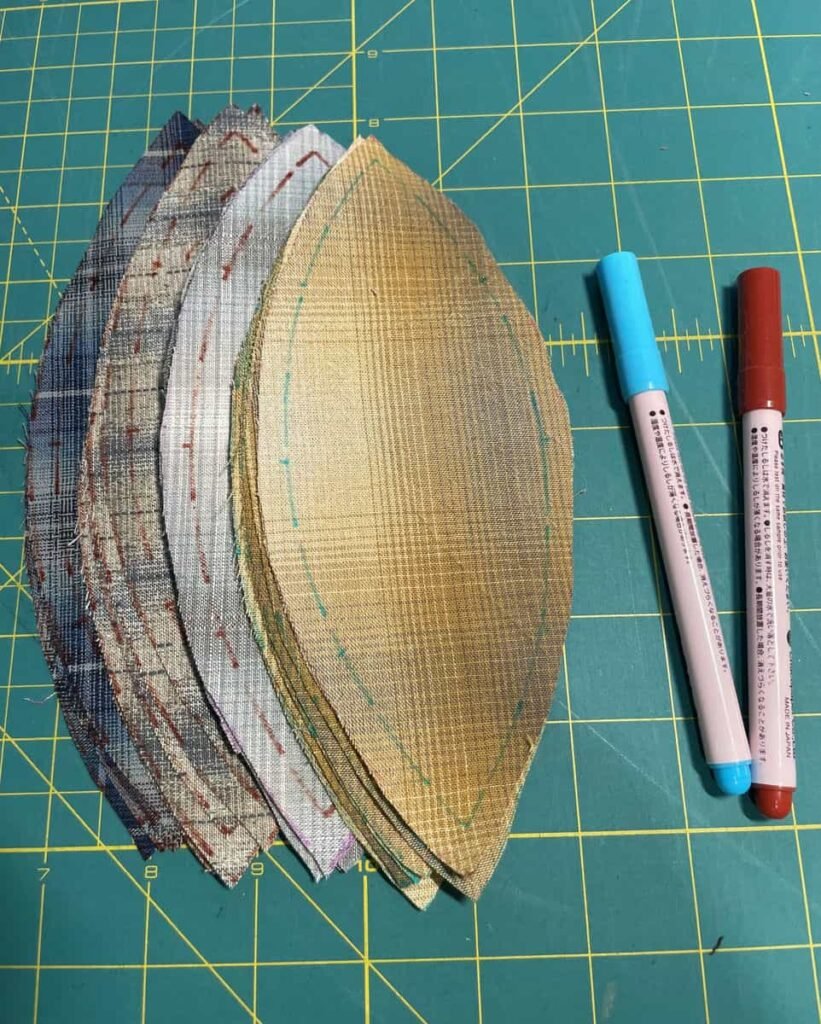
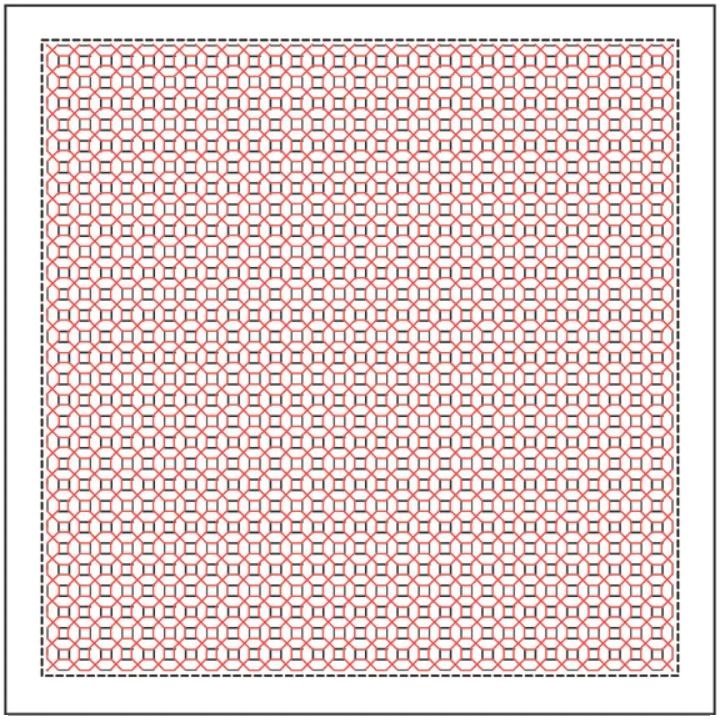
With all calculations done and materials gathered over the years, I embarked on the journey last weekend. Surprisingly, tracing and cutting the pieces took a lot longer than I thought! To make it easier, I cheated a little and used a template like the one shown in the picture below.” 🙂
During the camp, I was only able to cut the pile as shown in the picture below, with around 100 ovals and 40 centers. It took way longer than I thought because the centers had to be cut along the grain direction, but the ovals had to be at a 45° angle. Also, it used up markers very quickly. 🙂
“Precision, Appliqué, and Relaxing Piecing Work”
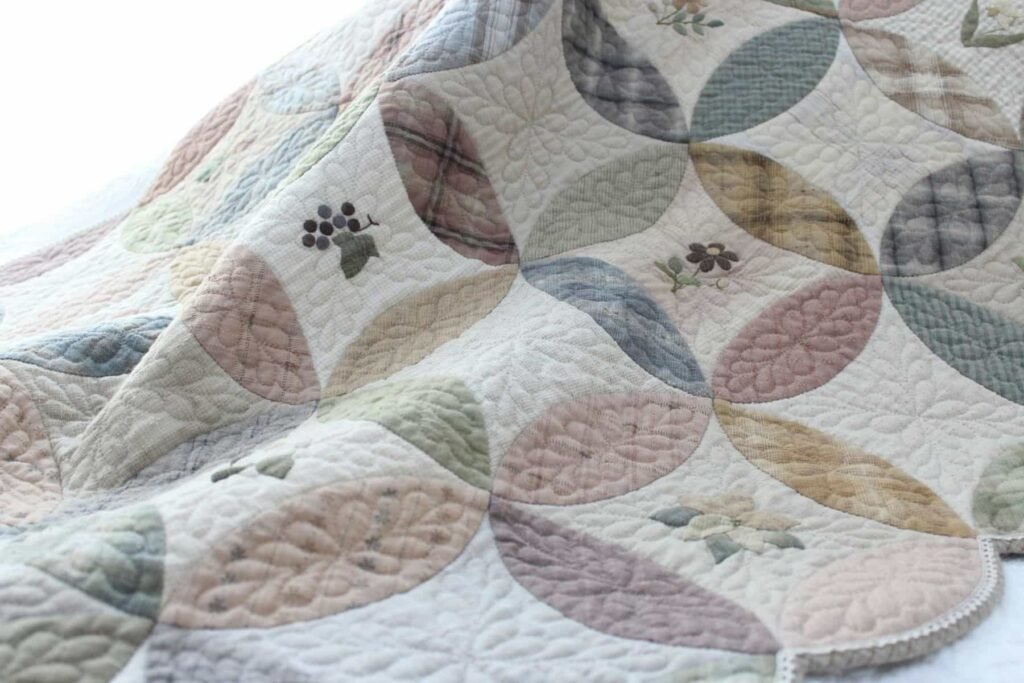
This quilt has every second block appliquéd with flowers. Apart from that, it will be very relaxing piecing work. For a good quality pieced block, lining up curved lines with accuracy is important, so all positioning points are marked clearly, as you can see on the pieces. Well, it’s just like every other project where preparation always takes most of the time. 🙂
To achieve a good quality pieced block, it’s important to line up curved lines with accuracy, I also used a lot of scraps gathered over the years.
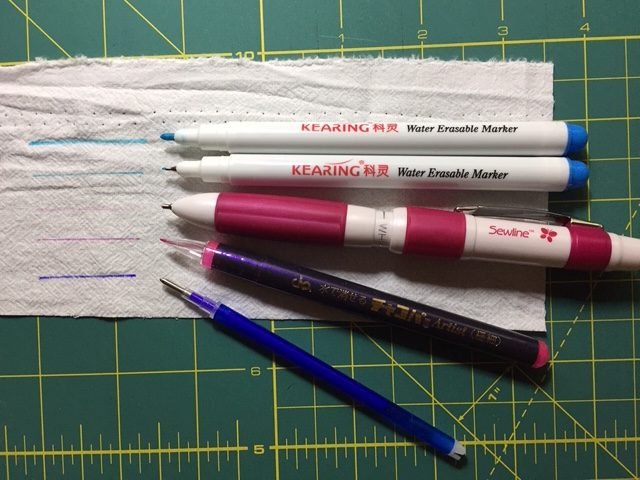
For your convenience, markers are available via the link provided below. Blue markers are suitable for most fabric types, while brown markers are recommended for blue or grey fabrics. To expedite the process, I’ve opted for thick-type markers, which facilitate quicker drawing compared to their thin counterparts.
Needlework tips and tricks. One of the first things to consider when starting a needlework project is selecting the right materials. The type of fabric, thread, and needle you choose can greatly impact the outcome of your design. For example, if you’re working on a delicate piece with fine details, you may want to opt for a finer fabric such as linen or even silk. These fabrics have a tighter weave, allowing for more precise stitching.
Similarly, the choice of thread can make a significant difference in the final result. There are various types of thread available, including cotton, silk, and metallic threads. Each type has its own unique characteristics and uses. Cotton thread is commonly used for general stitching and is available in a wide range of colors. Silk thread, on the other hand, is known for its lustrous appearance and is often used for decorative stitching or embroidery. Metallic threads can add a touch of sparkle and are perfect for creating eye-catching accents.
Once you’ve selected your materials, it’s essential to prepare your fabric before starting the actual stitching. This involves washing and ironing the fabric to remove any wrinkles or creases. It’s also a good idea to use a hoop or a frame to hold your fabric taut while you work. This helps to ensure even tension and prevents the fabric from puckering or distorting.
Another crucial aspect of needlework is choosing the right needle for the job. Needles come in various sizes and types, such as embroidery needles, tapestry needles, and beading needles. The size of the needle depends on the fabric and thread you’re using, as well as the type of stitch you’ll be working on. Generally, a smaller needle is suitable for finer fabrics and stitches, while a larger needle is better for thicker fabrics or more substantial stitches.
Once you have your materials and tools ready, it’s time to start stitching. One helpful tip is to always start with a clean and organized workspace. This will not only make it easier to find your supplies but also prevent any accidental spills or damage to your work. It’s also a good idea to have a small tray or container to hold your needles and thread, so they’re easily accessible.
As you begin stitching, it’s important to maintain good posture and hand positioning. Sitting in a comfortable chair with good back support and keeping your wrists relaxed can help prevent strain or fatigue. Holding the needle correctly is also essential. The most common grip is the pencil grip, where you hold the needle between your thumb and index finger. This allows for better control and precision while stitching.
Finally, practice makes perfect when it comes to needlework. Don’t be discouraged if your first few stitches don’t turn out as expected. With time and practice, you’ll develop your own unique style and improve your skills. Experiment with different stitches, patterns, and techniques to expand your repertoire and create stunning needlework pieces.
In conclusion, needlework is a versatile and rewarding craft that allows you to express your creativity and create beautiful designs. By following these essential tips and tricks, you’ll be well on your way to mastering the art of needlework and creating stunning pieces that you can cherish for years to come.
1. Choose the Right Supplies
Before you start any needlework project, it’s important to have the right supplies on hand. This includes selecting the appropriate needle, thread, fabric, and any additional tools or accessories that may be needed for your specific project.
When choosing a needle, consider the type of needlework you will be doing. There are different types of needles available, such as embroidery needles, tapestry needles, and beading needles. Each type has its own unique features and is designed for specific techniques.
For example, embroidery needles have a sharp point and a long eye, making them ideal for stitching on fabric. Tapestry needles, on the other hand, have a blunt tip and a large eye, which allows for easy threading of thicker threads and yarns. Beading needles are very fine and flexible, making them perfect for adding beads and sequins to your needlework.
Similarly, selecting the right thread is crucial. The type of thread you choose will depend on the fabric you are working with and the desired effect you want to achieve. Cotton thread is commonly used for embroidery, while silk thread is often used for more delicate projects. Polyester thread is a good option for projects that require durability, as it is strong and resistant to fading.
When it comes to fabric, there are a wide variety of options to choose from. Cotton and linen are popular choices for embroidery, as they are durable and easy to work with. Silk and satin are often used for more luxurious projects, while wool and felt are great for creating textured designs. Experiment with different fabrics to find the ones that work best for your projects.
In addition to needles, thread, and fabric, there are a few other tools and accessories that can make your needlework experience more enjoyable. A good pair of embroidery scissors is essential for cutting thread and trimming fabric. A thimble can protect your finger from getting pricked by the needle. Embroidery hoops or frames can help keep your fabric taut and prevent it from puckering. And don’t forget about embroidery patterns or designs, which can provide inspiration and guidance for your projects.
By choosing the right supplies for your needlework projects, you’ll be setting yourself up for success. Take the time to explore different options and find the tools and materials that work best for you. With the right supplies in hand, you’ll be ready to embark on your needlework journey and create beautiful, one-of-a-kind pieces.
2. Practice Proper Stitching Techniques
Mastering proper stitching techniques is essential for achieving clean and professional-looking needlework. Here are a few tips to keep in mind:
Start with a knot: Before you begin stitching, make sure to secure the thread with a knot to prevent it from unraveling. This simple step will save you from frustration and ensure that your stitches stay in place.
Use the right tension: Maintaining the correct tension on your thread is crucial for achieving neat and even stitches. Too loose, and your stitches may sag, resulting in a sloppy appearance. On the other hand, if your tension is too tight, your fabric may pucker, distorting the design. Experiment with different tensions until you find the sweet spot that works best for you.
Keep your stitches even: Aim for even and consistent stitches throughout your project. Irregular stitches can be distracting and take away from the overall aesthetic of your needlework. To achieve even stitches, pay attention to the spacing between each stitch and the length of each stitch. Practicing on a scrap piece of fabric can help you refine your technique and achieve the desired result.
Practice different stitch types: Familiarize yourself with various stitch types, such as running stitch, backstitch, satin stitch, and French knots. Each stitch has its own unique purpose and effect. Experimenting with different stitch types will not only expand your repertoire but also allow you to add texture and dimension to your needlework. Whether you’re working on a delicate floral design or a bold geometric pattern, having a variety of stitch techniques at your disposal will enable you to bring your vision to life.
Remember, practice makes perfect. The more you practice these stitching techniques, the more proficient you will become. Over time, you will develop your own style and finesse, allowing you to create beautiful and intricate needlework that showcases your creativity and skill.
3. Take Care of Your Needlework Tools
Proper maintenance of your needlework tools is essential for their longevity and optimal performance. Here are a few tips to help you take care of your tools:
Keep your needles and pins sharp: Sharpen your needles and pins regularly to ensure smooth and effortless stitching. You can use a needle sharpener or a fine-grit sandpaper for this purpose. A sharp needle or pin will make it easier to pierce through fabric and create neat and precise stitches. It will also reduce the risk of snagging or damaging the fabric.
Store your tools properly: Invest in a needlework storage case or organizer to keep your needles, threads, and other tools organized and protected from damage. Proper storage will prevent your tools from getting lost or misplaced, and it will also protect them from dust, dirt, and moisture. Additionally, consider using needle caps or covers to protect the tips of your needles when they are not in use.
Clean your tools after each use: Remove any excess thread or fabric fibers from your needles and scissors after each project. This will prevent buildup and ensure that your tools remain in good condition. You can use a small brush or a soft cloth to gently clean the surfaces of your tools. Avoid using harsh chemicals or abrasive materials that could damage the finish or the sharpness of your tools.
Replace worn-out tools: If your needles, scissors, or other tools become dull or damaged, don’t hesitate to replace them. Using worn-out tools can affect the quality of your needlework. Dull needles can cause frustration and uneven stitches, while damaged scissors can result in jagged or frayed edges. Regularly inspect your tools for signs of wear and tear, and replace them as needed to ensure that you always have the best tools for your projects.
By following these simple tips, you can ensure that your needlework tools remain in excellent condition and provide you with many years of enjoyable stitching. Taking care of your tools will not only improve your stitching experience but also help you achieve better results in your needlework projects.
4. Experiment with Different Techniques
Needlework offers a wide range of techniques and styles to explore. Don’t be afraid to step out of your comfort zone and experiment with different techniques to expand your skills. Trying out new techniques can be a thrilling experience, as it allows you to discover the endless possibilities that needlework has to offer.
One technique that you can explore is embroidery. Embroidery involves decorating fabric with a needle and thread, creating intricate designs and patterns. This technique allows you to add a personal touch to your projects by incorporating unique stitches and thread colors.
Another technique to consider is cross-stitch. Cross-stitch is a form of embroidery that uses X-shaped stitches to create a design. It is often done on even-weave fabric, such as Aida cloth or linen. Cross-stitch patterns can range from simple and geometric to elaborate and detailed, making it a versatile technique to experiment with.
If you’re interested in creating garments or accessories, knitting is a technique worth exploring. Knitting uses two or more needles to create fabric by interlocking loops of yarn. With knitting, you can create cozy sweaters, stylish scarves, and intricate lace patterns.
For those who prefer working with a single hook, crochet is a technique that offers endless possibilities. Crochet uses a hook to create fabric by pulling loops of yarn through other loops. This technique allows you to create intricate lacework, cozy blankets, and even three-dimensional sculptures.
If you have a passion for sewing, quilting is a technique that can take your needlework to the next level. Quilting involves sewing together layers of fabric to create a padded material, often used for blankets or decorative items. With quilting, you can experiment with different patterns, colors, and textures to create unique and personalized quilts.
By exploring different techniques, you can discover new ways to express your creativity and create unique needlework pieces. Whether you’re drawn to the delicate art of embroidery, the precise stitches of cross-stitch, the versatility of knitting and crochet, or the intricate designs of quilting, there’s a technique out there waiting for you to explore. So, embrace the opportunity to try something new and let your needlework journey unfold with endless possibilities.
5. Join a Needlework Community
Connecting with other needlework enthusiasts can be a great way to learn new techniques, get inspiration, and share your work. Consider joining a local needlework group or an online community where you can interact with fellow needleworkers.
Needlework communities often organize workshops, classes, and events where you can learn from experienced needleworkers. They can also provide valuable feedback and support as you progress in your needlework journey.
Additionally, participating in needlework challenges or swaps can motivate you to try new techniques and push your creative boundaries.
When you join a needlework community, you not only gain access to a wealth of knowledge and resources, but you also become part of a supportive network of individuals who share your passion. These communities are often filled with people who are eager to share their expertise and help others improve their skills. Whether you are a beginner or an experienced needleworker, there is always something new to learn and discover.
Local needlework groups offer the opportunity to meet fellow enthusiasts in person. You can attend regular meetings, where you can exchange ideas, ask questions, and receive guidance from more experienced members. Many groups also organize group projects, where members collaborate on larger-scale needlework pieces. This collaborative environment allows you to learn from others and gain valuable insights into different techniques and approaches.
If you prefer the convenience of online communities, there are numerous platforms dedicated to needlework. These platforms provide forums, chat rooms, and social media groups where you can connect with needleworkers from all over the world. You can share photos of your work, seek advice, and engage in discussions about various needlework topics. Online communities also offer the advantage of being accessible at any time, allowing you to connect with fellow needleworkers regardless of your location or schedule.
Furthermore, needlework communities often organize workshops and classes conducted by experienced needleworkers. These events provide the opportunity to learn new techniques, refine your skills, and gain insights from experts in the field. Workshops may focus on specific aspects of needlework, such as embroidery stitches, cross-stitch patterns, or knitting techniques. Participating in these workshops not only enhances your skills but also allows you to connect with like-minded individuals who share your enthusiasm for needlework.
Finally, needlework challenges and swaps are popular activities within needlework communities. Challenges often involve creating a piece of needlework based on a specific theme or using a particular technique. These challenges encourage you to step out of your comfort zone, experiment with new ideas, and showcase your creativity. Swaps, on the other hand, involve exchanging handmade needlework items with other members of the community. Participating in swaps allows you to receive unique needlework pieces from other talented individuals while sharing your own creations.
In conclusion, joining a needlework community offers numerous benefits for needlework enthusiasts. Whether you opt for a local group or an online community, you will have the opportunity to learn, share, and grow as a needleworker. The support, knowledge, and inspiration gained from these communities can significantly enhance your needlework journey and help you develop your skills to new heights.
Often I heard people say they would like to pick up Sashiko stitching but how to get it started?
Sashiko Stitchwork a timeless craft:
I’m going to share with you my experiences and insight, which perhaps not everyone agrees to. It’s just my own opinion based on research, study, learning and practicing. If it’s helpful for you – great, or – it can be left aside:
I picked up sashiko stitching years ago for its simplicity and complexity, practicality and effectiveness in terms of big, thick thread and big stitches on dark indigo fabric. The seemly unchangeable geometric patterns are lively and even cheeky when they are used as a part to compose a design … The forever young indigo and brown… why do they never grow old and out of life? Just simply beautiful. My love for this skill took me to research its history, study from books, videos, other fellow stitchers near and far and most of all – pieces were made by those in the past.
There is so much in this ancient yet modern technique. But, to taste it, grasp it and appreciate its beauty ins and outs, I’d suggest diving in and doing it. When you start tracing pattern with your pen and your threaded needle passes through your fabric, sashiko teaches you what it is 🙂
It’s a type of Japanese folk art used by ordinary women in the past to mend worn clothing or home-wares, extending the life of these items and adding beauty through intricate stitching. During cold winters, sashiko stitching served a dual purpose of mending and insulation. By layering fabrics and stitching them together with the running stitch, women could create warm and cozy garments and blankets to keep themselves and their families comfortable during the harsh winter months.
A book cover I made with Sashiko Stitch.
In an age of mass production and disposable consumerism, products like this stand out as a reminder of the value of slow, deliberate creation. They invite us to pause, to appreciate the beauty in simplicity, and to rekindle our connection with the tangible world around us.The next time you pick up a book, take a moment to appreciate its cover. And if it happens to be adorned with Sashiko stitching, allow yourself to be transported not only into the narrative within but also into a realm where artistry and storytelling intertwine in a tapestry of beauty and tradition.
Learning how to Sashiko Stitch involves several key steps:
Gather Materials:
When diving into the world of sashiko, acquiring the right supplies is crucial to ensure a successful and enjoyable stitching experience. While many basic sewing supplies can be used for sashiko, there are some specific tools and materials that are tailored to this traditional Japanese embroidery technique.
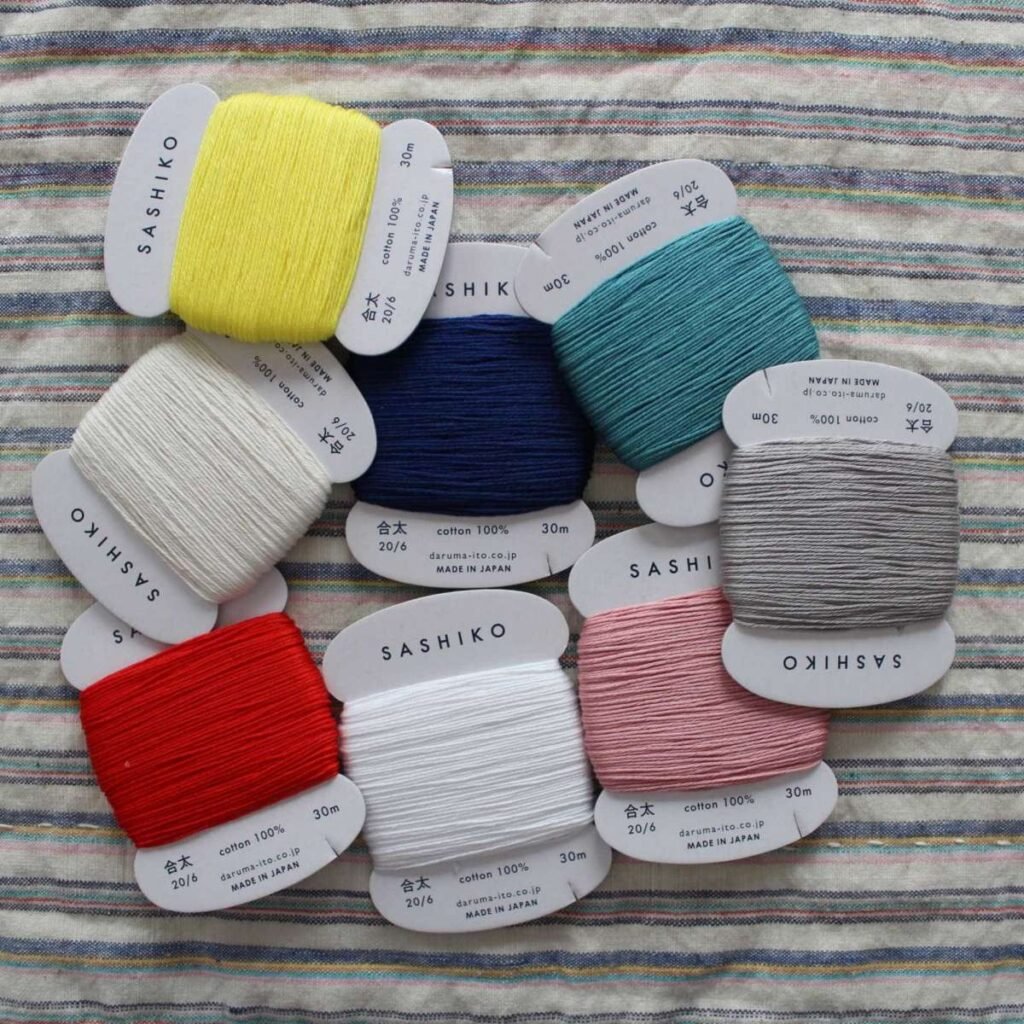
First and foremost, invest in high-quality sashiko thread. Sashiko thread is typically thicker than regular embroidery thread, which gives your stitches a bold and distinctive look. Although traditional sashiko often involves white or indigo thread, it’s available in a wide range of colors.. Experimenting with different colors can add a modern twist to your sashiko projects while staying true to the essence of this ancient art form.
Next, consider using indigo fabric for your sashiko projects. Indigo-dyed fabric has a rich history in Japanese textile traditions and is often associated with sashiko. Its deep blue hue provides a striking contrast to the white or colored sashiko thread, resulting in visually captivating designs. Look for indigo-dyed fabric specifically marketed for sashiko or opt for other tightly woven cotton fabrics that can withstand the rigors of stitching.
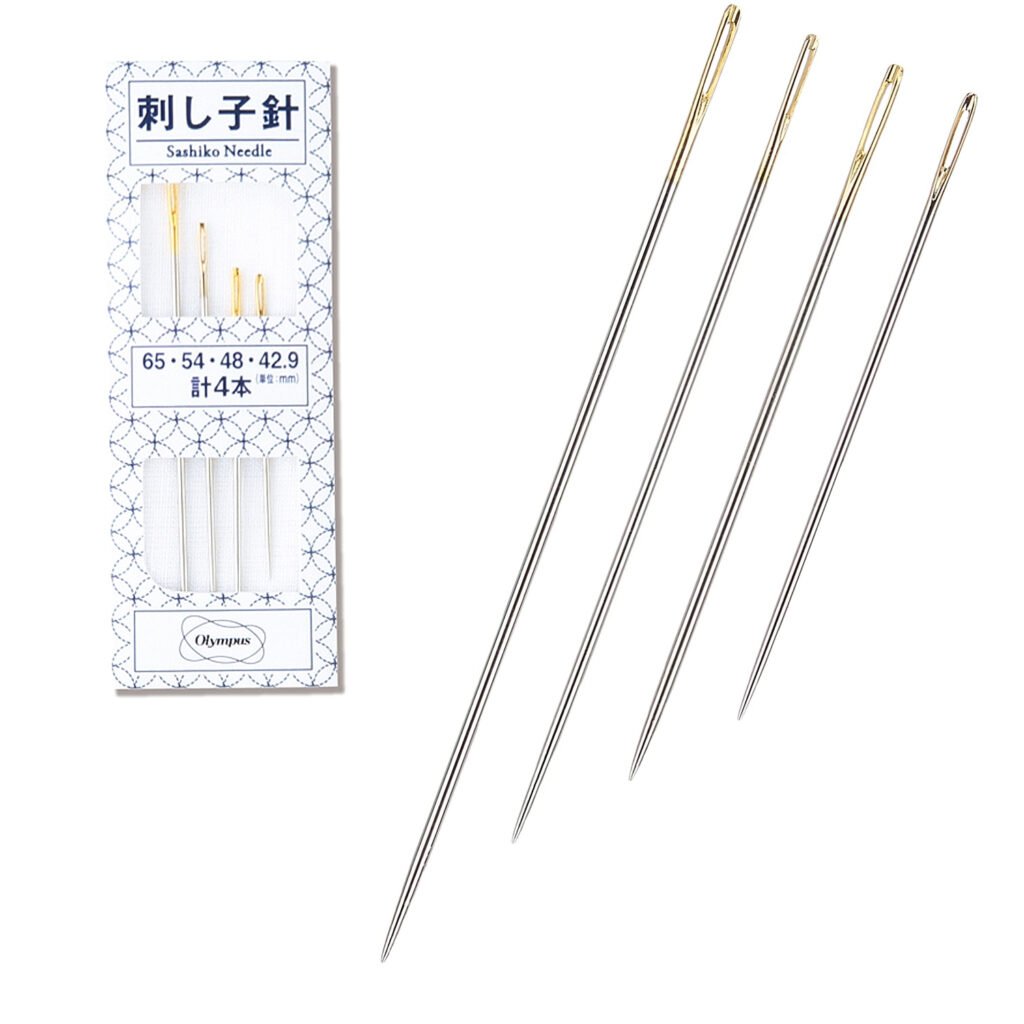
When it comes to needles, sashiko needles are long, sturdy, and have a larger eye compared to regular sewing needles. Their length allows for multiple stitches to be loaded onto the needle at once, making stitching more efficient. Additionally, the sturdy construction of sashiko needles ensures they can withstand the repeated pushing and pulling required for sashiko stitching without bending or breaking.
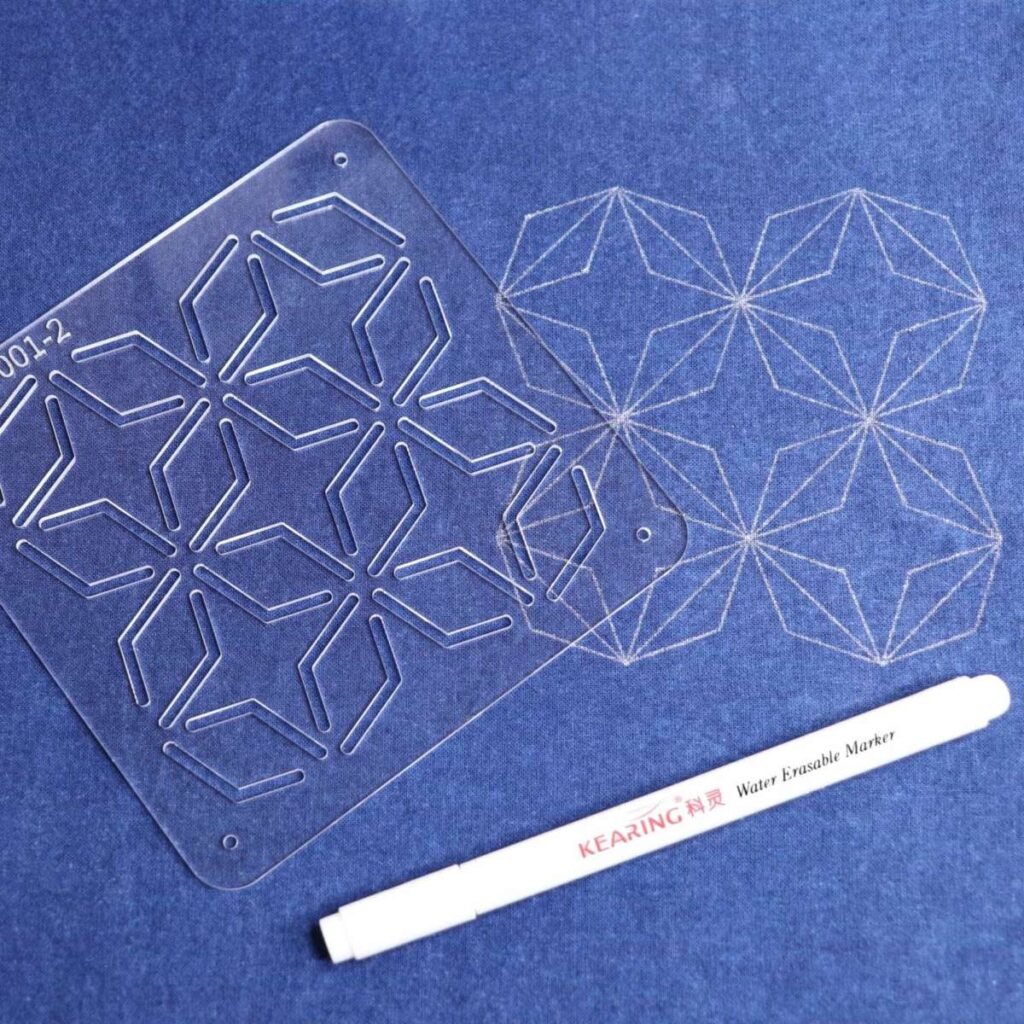
To transfer your sashiko designs onto fabric, use a water-soluble fabric marker. These markers allow you to draw your design directly onto the fabric with ease, and the markings disappear with a simple spritz of water once you’ve finished stitching. This ensures that your design remains visible while you work without leaving any permanent traces behind.
By acquiring sashiko-specific supplies such as indigo fabric, sashiko thread, needles, and fabric markers, you’ll have everything you need to embark on your sashiko stitching journey with confidence. With the right tools at your disposal, you’ll be able to create stunning sashiko pieces that showcase the beauty and intricacy of this timeless embroidery technique.
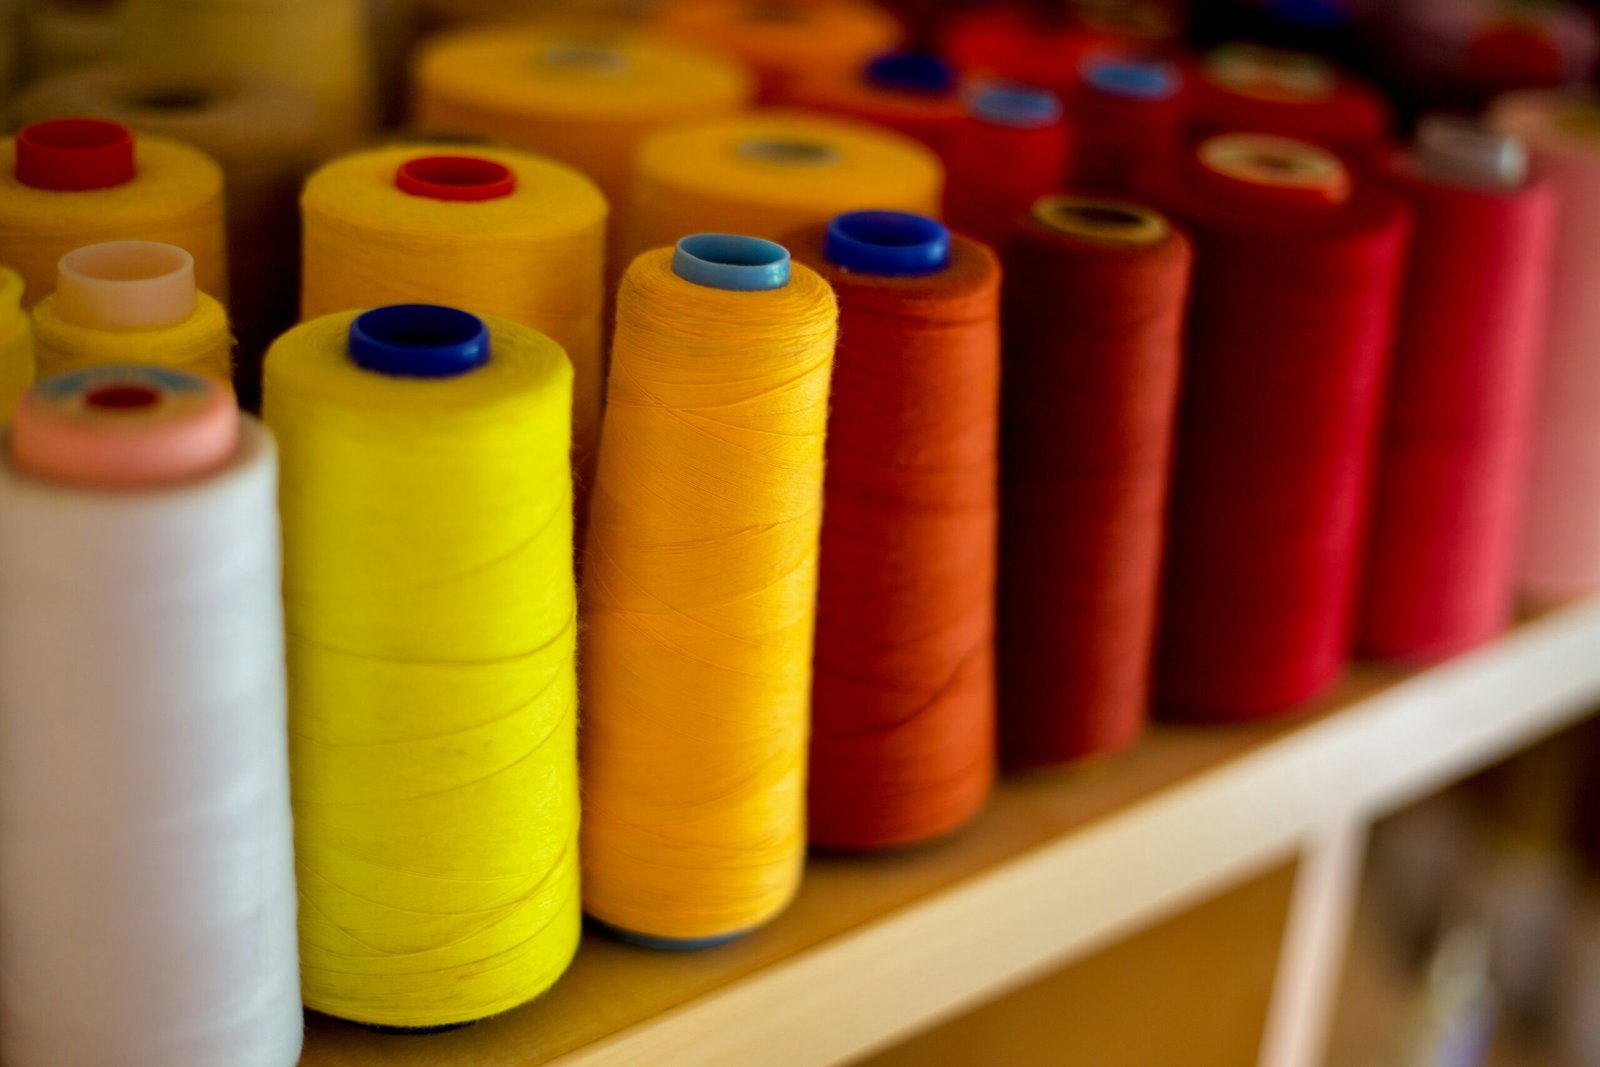
Sashiko Threads
Sashiko Needles
Fabric, Template & Marker
Understanding Basic Techniques:
Sashiko primarily employs a running stitch, a simple yet versatile stitch that forms the foundation of this embroidery technique. Traditionally, sashiko stitching is done in a grid pattern, with rows of evenly spaced running stitches creating geometric designs and patterns.
To familiarize yourself with the running stitch, start by threading your sashiko needle with your chosen sashiko thread. Begin by bringing the needle up through the fabric from the backside, leaving a small tail of thread to secure. Then, insert the needle back into the fabric a short distance away, creating a straight stitch. Continue this process, spacing your stitches evenly and keeping them parallel to one another.
As you stitch, pay attention to the length and tension of your stitches, aiming for consistency to ensure a neat and uniform appearance. Practice creating even, straight lines by maintaining a steady hand and gently guiding the needle through the fabric.
Keep in mind that sashiko stitches are typically longer than those used in traditional embroidery, with each stitch spanning multiple threads of fabric. This helps to create a distinctive textured effect and adds to the visual appeal of the finished piece.
Experiment with different stitch lengths and spacing to achieve different effects and textures in your sashiko work. For example, stitching closer together will create denser patterns, while spacing stitches farther apart will result in more open and airy designs.
As you become more comfortable with the running stitch, you can explore variations such as double running stitch or seed stitch to add depth and complexity to your sashiko projects. These variations allow for greater creativity and expression while still maintaining the simplicity and elegance that are characteristic of sashiko embroidery.
By familiarizing yourself with the running stitch and practicing creating even, straight lines, you’ll build a strong foundation for your sashiko stitching journey. With patience, practice, and a little creativity, you’ll soon be stitching stunning sashiko designs with confidence and skill.
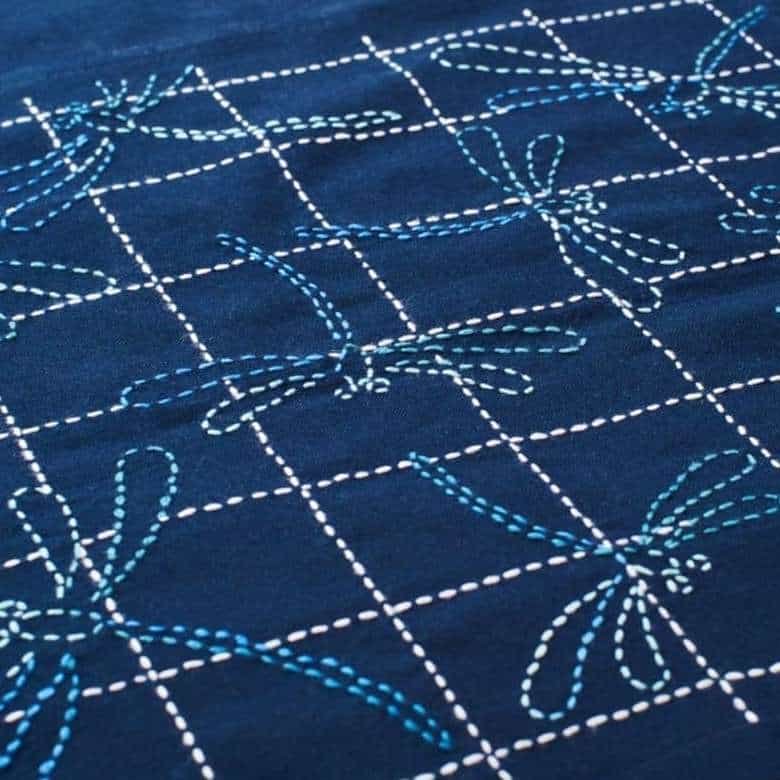
Dragonflies
Hemp leaf Design
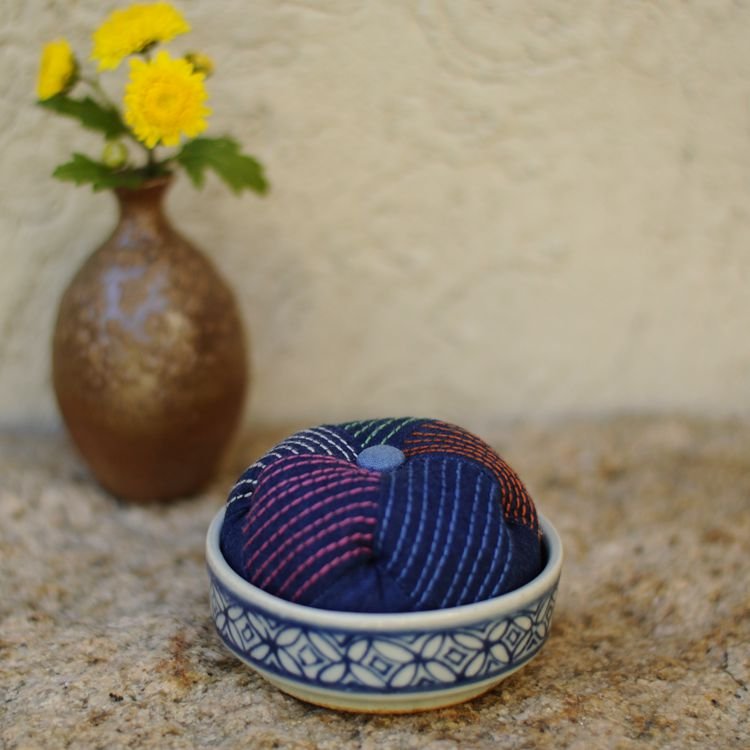
Pin Cushion
Preparing the Fabric:
Before starting your sashiko stitching, it’s essential to prepare your fabric by cutting it to the desired size and marking your stitching lines using a fabric marker. This step ensures that your stitches are evenly spaced and your design remains cohesive.
Start by selecting a piece of fabric that is suitable for sashiko stitching. Traditionally, tightly woven cotton fabrics such or linen are preferred for their durability and ability to hold stitches well. You can choose to work with pre-cut fabric squares or purchase fabric by the yard and cut it to your desired size using fabric scissors or a rotary cutter and cutting mat.
Once you have your fabric cut to size, it’s time to mark your stitching lines using a fabric marker. For traditional sashiko designs, geometric patterns or motifs are often featured, such as squares, diamonds, or interlocking circles. You can find pre-printed sashiko fabric with these designs already marked, or you can create your own design by drawing it directly onto the fabric.
Using a fabric marker, lightly sketch stitching lines onto the fabric, ensuring you evenly space and align them according to your chosen design. Keep in mind that sashiko stitches are typically worked in a grid pattern, so you may want to use a ruler or grid template to help guide your markings and maintain consistency.
As you mark your stitching lines, take care to use a light touch to avoid pressing too hard on the fabric, which can cause the markings to become difficult to remove later. It’s also a good idea to test the fabric marker on a scrap piece of fabric to ensure it will wash out cleanly once you’ve finished stitching.
Once your fabric is marked and ready to go, you’re all set to begin your sashiko stitching journey. With your design in place and your fabric prepared, you can now focus on the meditative and rewarding process of stitching, bringing your sashiko masterpiece to life one stitch at a time.
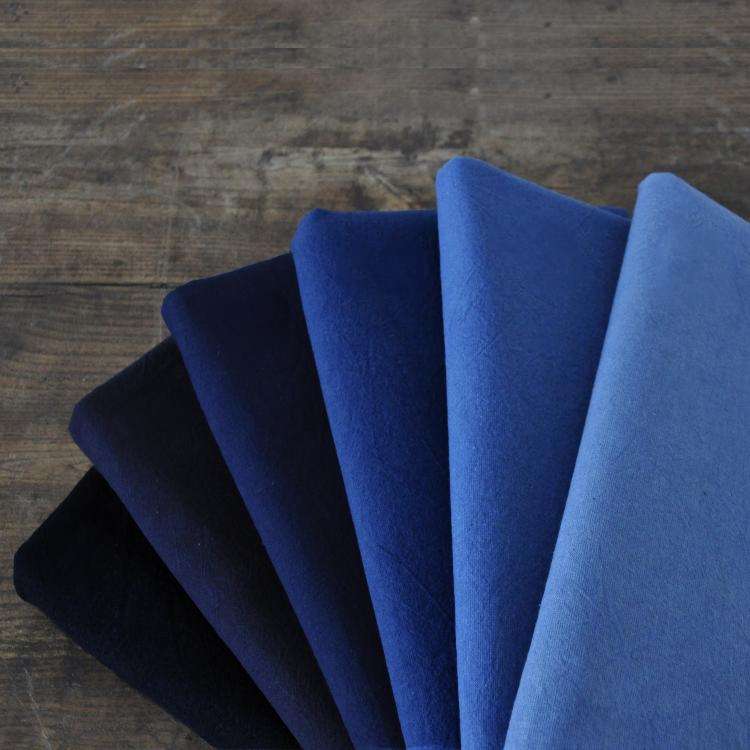
Indigo Hand-Dyed
Sashiko Sampler
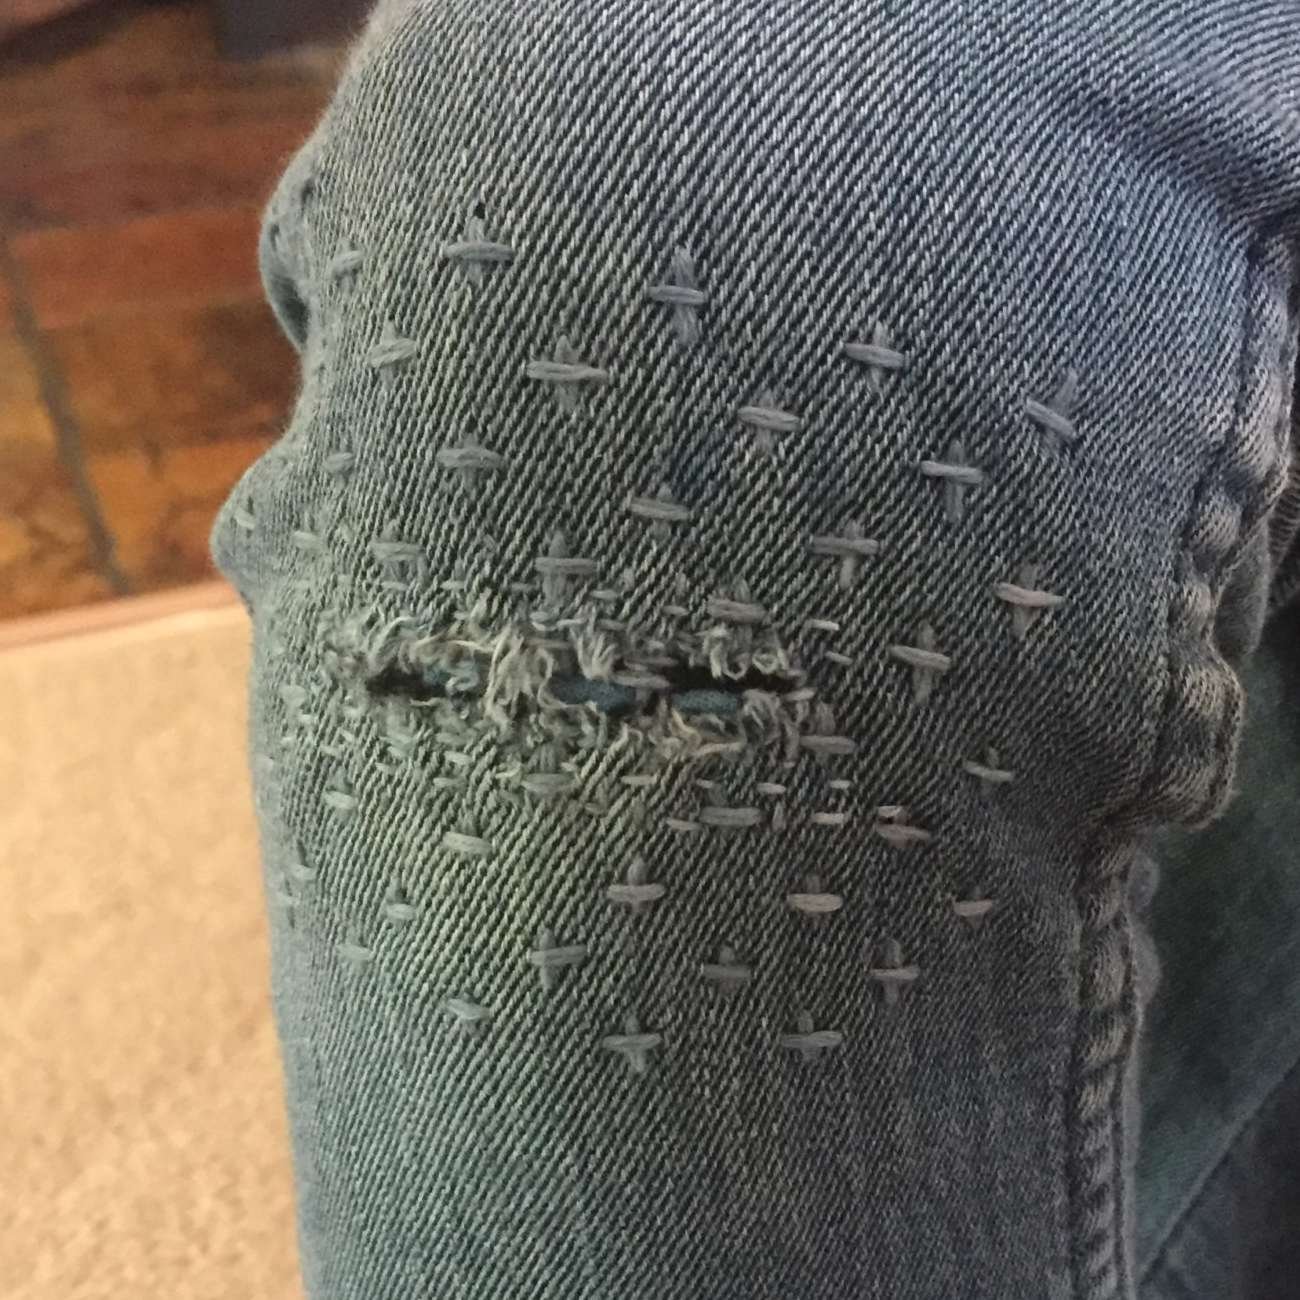
mending worn Jeans
Thread Your Needle:
Before you begin stitching, it’s time to thread your sashiko needle with a length of sashiko thread. Sashiko needles are longer and sturdier than traditional sewing needles, with a larger eye to accommodate the thicker sashiko thread.
Start by cutting a length of sashiko thread, typically around 18 to 24 inches long, depending on the size of your project and your personal preference. Sashiko thread is thicker than regular embroidery thread, giving your stitches a bold and distinctive look.
Next, gently thread one end of the sashiko thread through the eye of the sashiko needle, taking care to leave a small tail of thread protruding from the eye. This tail will be used to secure the thread in place with a knot once the needle is fully threaded.
To create a knot at the end of your thread, you can use a simple overhand knot or a double knot for added security. Hold the tail of the thread between your thumb and forefinger, then wrap the thread around your finger once or twice to form a loop. Pull the end of the thread through the loop to create a knot, tightening it securely against the fabric.
Alternatively, you can use a quilter’s knot to start your stitching without leaving a visible knot on the fabric. To create a quilter’s knot, pinch the end of the thread between your thumb and forefinger, then wrap the thread around the tip of your needle two or three times. Hold the wraps in place with your thumb and forefinger, then slide the wraps off the needle and pull tight to form a knot at the end of the thread.
Start Stitching:
With your fabric prepared, needle threaded, and design marked, it’s time to begin stitching your sashiko masterpiece.
Start by positioning your needle at the beginning of one of your marked stitching lines, ensuring you secure the knot or tail of your thread on the backside of the fabric.
To execute the running stitch, push the needle up through the fabric from the backside, pulling it through until the knot or tail of the thread catches on the fabric and prevents it from pulling through completely. Then, insert the needle back into the fabric a short distance away, typically about 4mm to 6mm, creating a straight stitch on the surface of the fabric.
As you stitch, focus on maintaining even spacing and consistent stitch length to achieve a uniform appearance. The running stitch should be neat and tidy, with each stitch parallel to the next and evenly spaced along the stitching line. Take your time and work methodically, paying close attention to detail as you progress along your marked lines.
To maintain consistent spacing between stitches, you can use your thumb or index finger to guide the needle as you work, keeping each stitch the same distance apart. Alternatively, you can use a ruler or grid template to help guide your stitches and ensure they remain straight and evenly spaced.
As you stitch, periodically check the tension of your thread to ensure it’s neither too loose nor too tight. The thread should glide smoothly through the fabric without causing puckering or distortion. Adjust your tension as needed by gently pulling on the thread to tighten or loosen it as required.
Continue stitching along your marked lines, following your design and filling in each section with the running stitch. Take breaks as needed to rest your hands and eyes, and enjoy the meditative and rhythmic process of sashiko stitching.
With each careful stitch, you’re not only creating a beautiful piece of textile art but also connecting with centuries of tradition and craftsmanship. So, embrace the journey and immerse yourself in the timeless art of sashiko stitching, one stitch at a time.
Maintain Tension:
Keeping your fabric taut as you stitch is essential for maintaining even tension and preventing puckering in your sashiko work. Puckering occurs when the fabric becomes wrinkled or gathered due to uneven tension in the stitches, detracting from the overall appearance of your piece.
By keeping your fabric taut and maintaining even tension throughout the stitching process, you’ll achieve professional-looking results that showcase the beauty and precision of sashiko embroidery. So, take your time, pay attention to detail, and enjoy the satisfaction of creating flawless sashiko workmanship.
Explore Patterns:
As you continue to hone your sashiko skills, don’t be afraid to experiment with different patterns and designs. While traditional geometric motifs are a classic choice, there’s also plenty of room for creativity and innovation in sashiko stitching.
Explore traditional patterns inspired by nature, such as waves, pine needles, or cherry blossoms. These motifs have deep cultural significance in Japan and can add a touch of elegance and symbolism to your sashiko projects.
Alternatively, try your hand at contemporary variations of sashiko, incorporating modern elements and personal touches into your designs. Experiment with asymmetrical patterns, abstract shapes, or even combine sashiko with other embroidery techniques for a unique look.
Consider playing with color as well, using contrasting threads to create bold, eye-catching designs or subtle variations for a more understated effect. Remember that you don’t have to limit sashiko to traditional indigo and white; feel free to experiment with a rainbow of hues to suit your personal style.
If you’re feeling adventurous, try mixing different stitches and techniques to create intricate textures and patterns. Combine running stitch with decorative stitches like kawari-nui (ornamental stitching) or hitomezashi (one-stitch sashiko) to add depth and dimension to your designs.
Don’t be afraid to let your imagination run wild and push the boundaries of traditional sashiko. After all, sashiko is a versatile art form that has evolved over centuries, and there’s no limit to what you can create with a needle, thread, and a bit of creativity.
Practice and Patience:
Stitching, like any skill, takes time and practice to master, so be patient with yourself as you develop your sashiko skills. If you’re new to sashiko, it’s best to start with simpler designs and gradually progress to more complex patterns as you become more confident in your abilities.
Begin by practicing basic stitches such as running stitch, the foundation of sashiko, and then experiment with variations like seed stitch or chain stitch. These simple stitches will help you become familiar with the rhythm and tension required for sashiko stitching.
As you gain proficiency with basic stitches, you can start incorporating them into simple geometric patterns or traditional motifs like waves, mountains, or flowers. There are countless sashiko patterns and designs to explore, so don’t be afraid to experiment and find what resonates with you.
Remember to take your time and focus on the process rather than rushing to finish. Sashiko is as much about mindfulness and meditation as it is about creating beautiful textiles. Enjoy the rhythmic repetition of stitching and the satisfaction of seeing your design come to life with each stitch.
If you make mistakes along the way, don’t get discouraged. Sashiko is forgiving, and imperfections are part of its charm. Embrace the uniqueness of your work and learn from any errors to improve your skills for future projects.
Above all, have fun with your sashiko journey. Whether you’re stitching for relaxation, creativity, or cultural appreciation, sashiko offers a rewarding and fulfilling experience that you can continue to enjoy for years to come. So, gather your materials, find inspiration in traditional patterns or create your own designs, and let the stitching begin!
Finishing of your Sashiko Stitchwork:
Once you’ve completed your stitching, it’s time to put the finishing touches on your sashiko piece. Start by gently washing away any fabric markings or residue left from your stitching process. Use lukewarm water and a mild detergent, being careful not to agitate the fabric too much to avoid distorting the stitches.
After washing, carefully rinse the piece to ensure you remove all soap, then gently squeeze out excess water. Next, lay the piece flat on a clean towel and roll it up, pressing gently to remove even more moisture. You can repeat this process with a dry towel to further absorb excess water.
Once your sashiko piece is damp rather than wet, it’s time to press it to set the stitches. Lay the piece flat on an ironing board or a clean, flat surface, making sure the stitches are lying flat and evenly distributed. Use a warm iron, without steam, to press the piece from the back side. Avoid pressing directly on top of the stitches to prevent flattening them.
Continue pressing until the fabric is dry and the stitches are set. Take care not to over-press, as this can cause the fabric to become stiff and lose its natural drape.
Once your sashiko piece is dry and pressed, take a moment to admire your handiwork. You’ve transformed a simple piece of fabric into a beautiful work of art, rich with history and tradition. Whether you choose to frame it, incorporate it into a larger project, or simply display it as is, your sashiko piece is sure to be a cherished addition to your home.
Now that you’ve finished your piece, you can proudly showcase your skills and share the beauty of sashiko stitching with others. Enjoy the satisfaction of a job well done, and consider exploring new patterns and techniques for your next sashiko project.
Completing your Sashiko Stitchwork
After completing your Sashiko Stitchwork, take a moment to truly admire your creation. Appreciate the time and effort you’ve put into each stitch, forming intricate patterns and designs. Hold the fabric up to the light and observe how the threads intertwine, creating a beautiful texture.
Now, let your imagination soar as you consider the many ways you can incorporate your sashiko piece into various projects. If you’re passionate about quilting, why not integrate it into a quilt top as a striking focal point? The contrasting colors and geometric shapes of sashiko can add depth and visual interest to your quilt design.
Alternatively, you could use your sashiko piece to embellish clothing, such as adding it to the pockets of a denim jacket or the cuffs of a shirt. This personalized touch will elevate your wardrobe with a unique and handmade flair.
For those interested in home decor, consider framing your sashiko piece and displaying it as wall art. It will serve as a testament to your creativity and craftsmanship, adding character and charm to any room.
No matter how you choose to incorporate your sashiko piece into your projects, remember to enjoy the process and take pride in your handiwork. Each stitch tells a story and reflects your dedication to the art of sashiko.
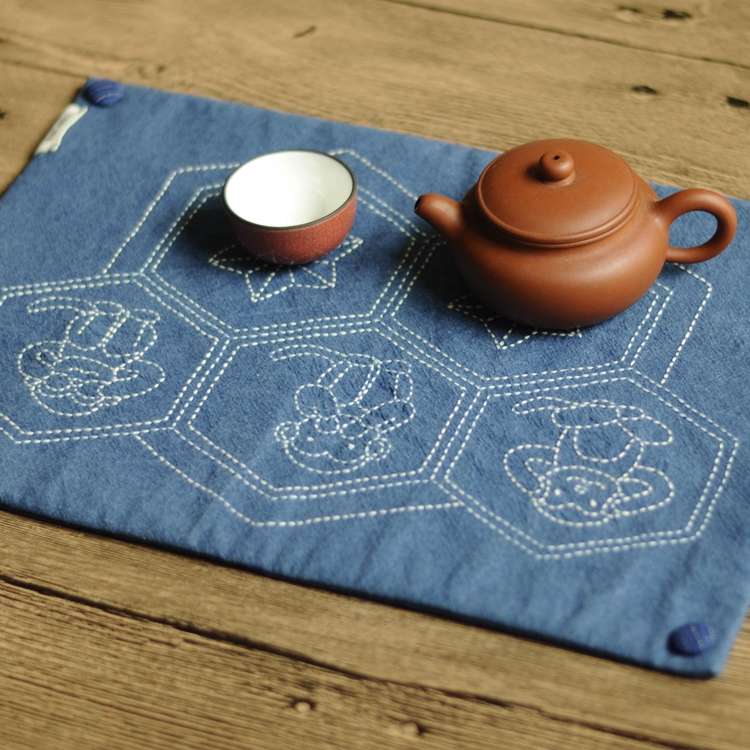
3-Monkey Tea Mat
Lotus Table Runner
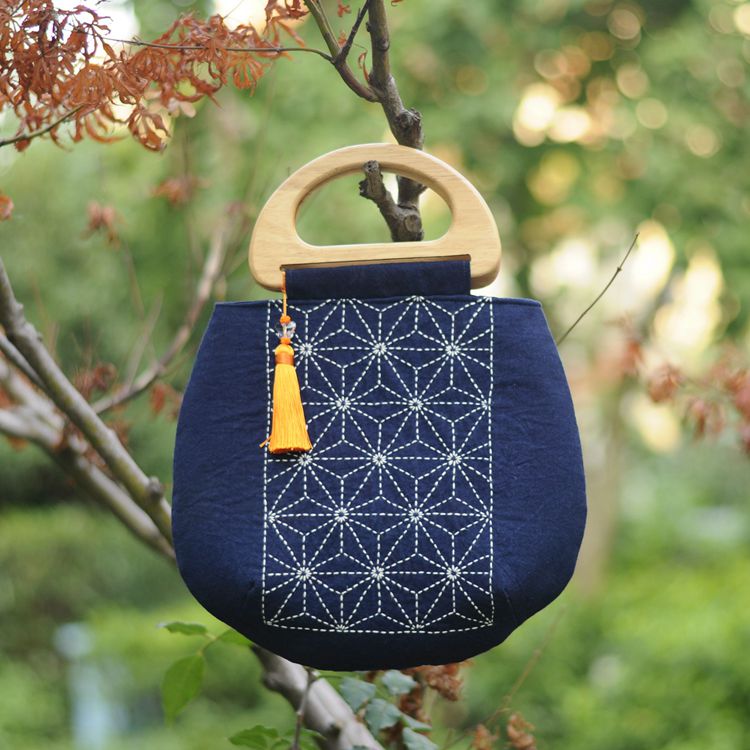
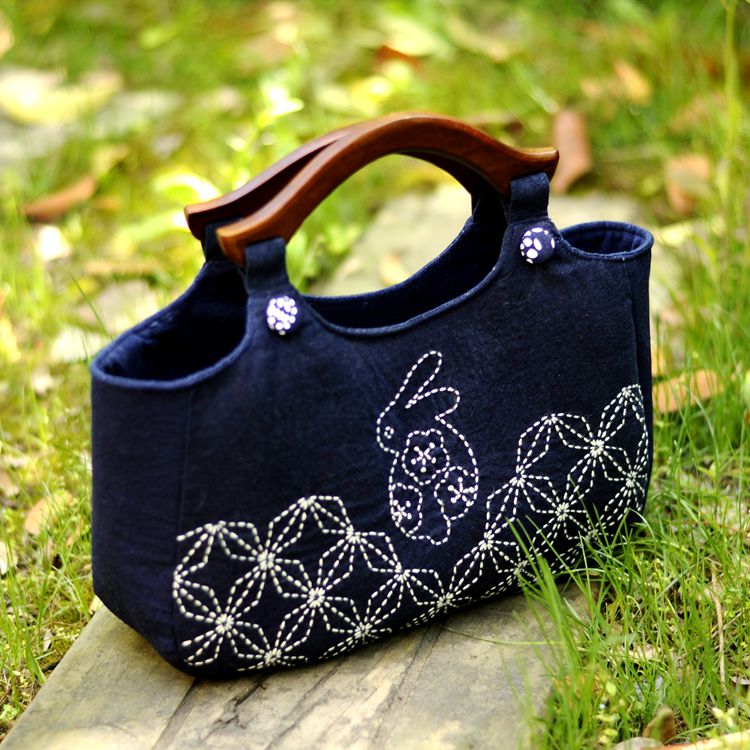
Good Fortune Handbag
Sashiko Stitching Journey of Exploration and Discovery
So grab your stitching supplies and embrace the possibilities to let your creativity shine. Whether you prefer traditional motifs or want to explore your own style, sashiko provides limitless opportunities for creativity. Enjoy stitching and let your imagination guide you as you bring your vision to life with each stitch.
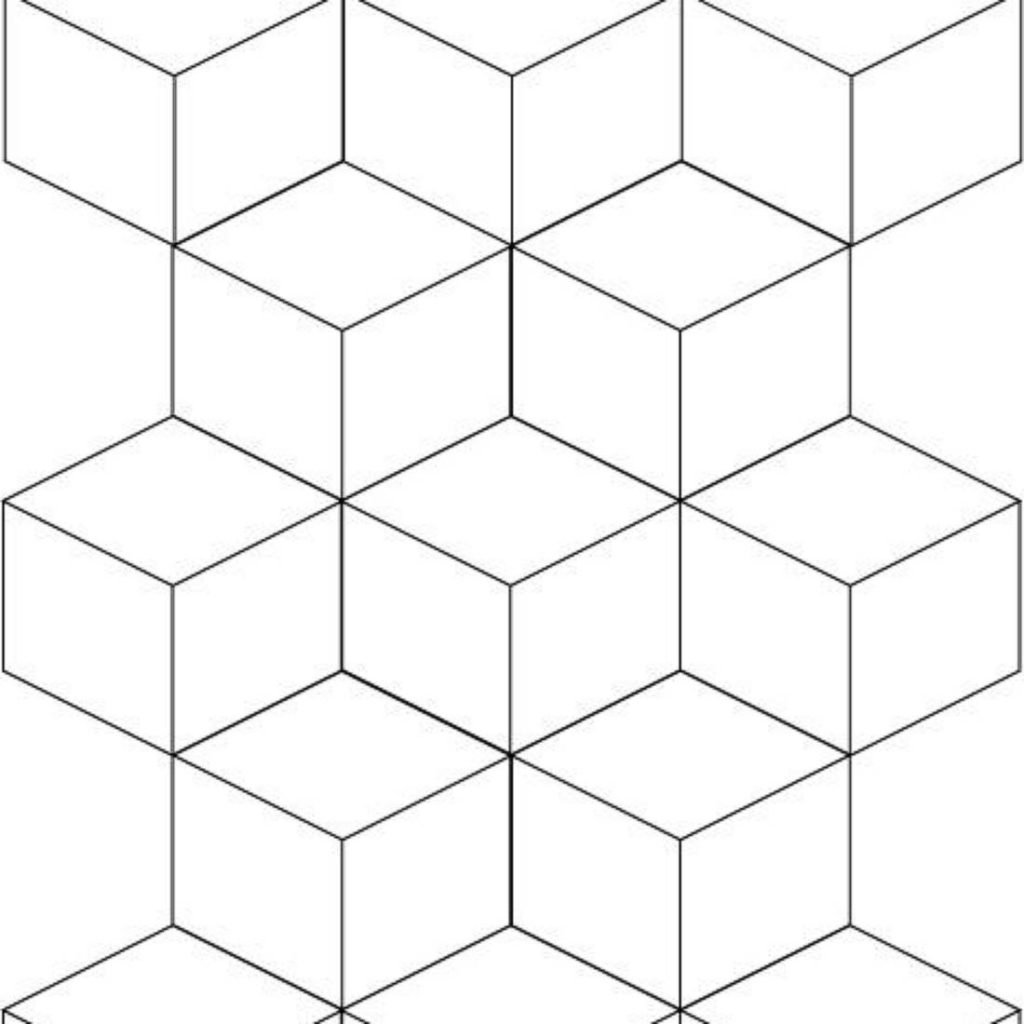
Sashiko pattern turtle’s shell: A representative pattern that means good luck
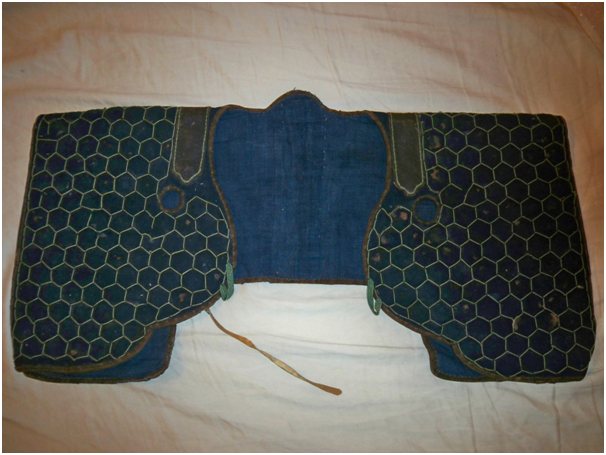
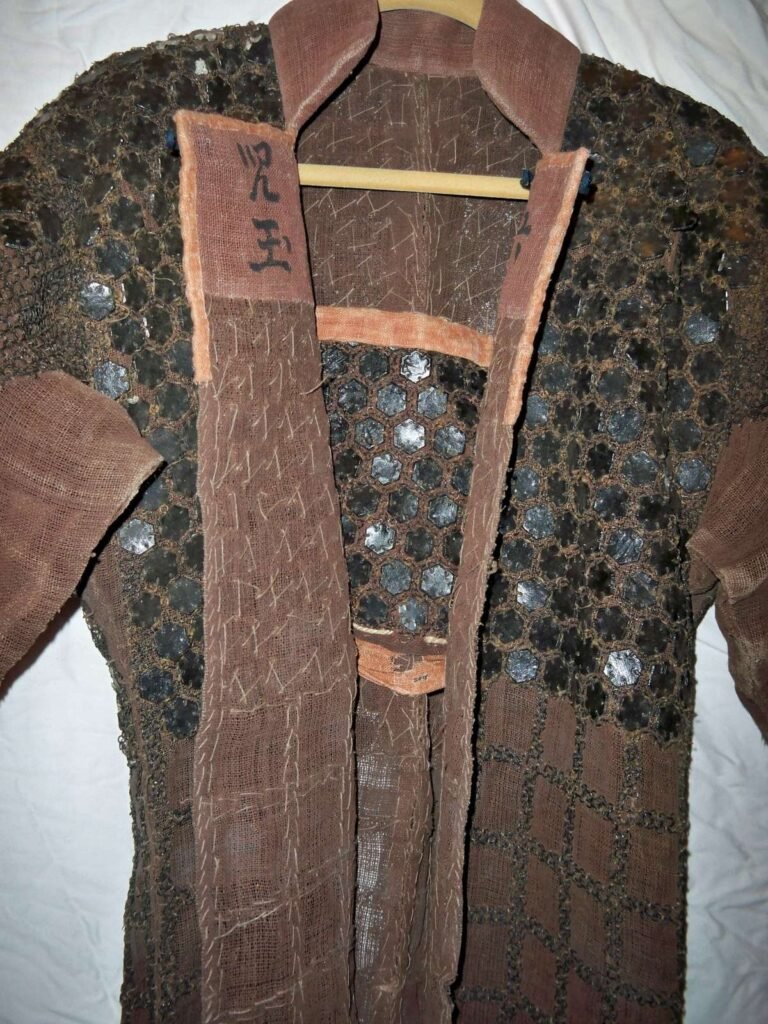
Kikko (Japanese armour)
Antique Edo period samurai kikko katabira
The “Kikko” pattern, also known as the “turtle’s shell,”
The common hexagonal pattern known as “Kikko” (sashiko pattern turtle’s shell) is a well-known symbol of good fortune in Japan. There are many such propitious symbols: in animals, they include the dragon, Chinese phoenix, crane and turtle. And among plants, the pine tree, bamboo, Japanese plu, Chrysanthemum and peony. Chinese characters which can be seen on T-shirts purchased by visitors to Japan, such as 寿(kotobuki) and 福 (fuku), are also signs of good luck. These symbols reflect common wishes for eternal youth, longevity, prosperity and wealth, among others.
The hexagonal Kikko pettern, call “beehive” in English and “turtle’s shell” in Japanese, has an extremely long history. It first appeared in ancient civilizations of West Asia, as well as on colored earthenware in prehistoric Iran. The pattern was said to have been found on scraps of men’s clothing in ninth century B.C. Assyria and in 12th century B.C. Babylon.
“The Geometric Origins and Cultural Significance of the Kikko Pattern”
In parts of West Asia, particularly Islamic countries, repetitive geometric shapes termed “arabesques” were popular. This suggests that the hexagonal shape of the Kikko may have originated in a purely geometric design, rather than the figurative forms of turtle’ shells or beehives. However, its frequent usage indicates that the design carrie deep meaning in many cultures.
“Influence of the Kikko Pattern Along the Silk Road”
The Kikko pattern was introduced to China through the Silk Road, which lead from Persia and India to the desert towns of Western. China, and although it was used as a decoration for woven materials and on the walls of temples, it was always seen as a symbol of power and spiritual strength. In China, a turtle has traditionally represented longevity, together with such imaginary animals as the dragon, Chinese phoenix and fire-breathing horse. It has believed that the patterns on a turtle’s shell became associated with the hexagonal design during the height of the Silk Road, some 3000 years ago.
“Evolution and Influence of the Kikko Pattern in Japan”
The Kikko pattern came to Japan along with the introduction of Buddhism. It was first used to decorate materials and buildings. In the Muromachi period (1336-1598), when Noh plays were popular, it was used as a popular design for stage décor and for the costumes worn by aristocratic characters and long-lived men. Today, the Kikko pattern can be found at Japanese wedding ceremonies. It appears on the bride’s kimono and accessories. It also found on the kimono of the wedding guests and even on the wall paper of the wedding hall.
Man has forever wished for eternal youth, wealth and longevity. With the recent improvements in medicine and technology, the average life span in Japan has reached 80 years. Since World War II, the Japanese have achieved great prosperity. So, what can Japanese people now wish for?
This article is extracted from Sashiko Blue and White Quilt Art of Japan by Kazuko Mende and Reiko Morishige.
There are so many markers out there and they all say they are good in one way or another. So, which one to use? And which one won’t cost me a fortune?
My first marker was a Sewline – a mechanical marker purchased years ago. It has many colors available on lead and marks fine lines plus it looks pretty itself. It went through a lot of projects with me until I took on a big applique quilt. When I used it to draw a long straight line for joining large applique pieces together, it started to scratch my fabric. So I bought my 2nd marker of Cha. Cha water erasable marker has a fine ceramic tip from which ink flows easily without effort and doesn’t bleed. That resolved the issue I had with drawing long lines.
As one of “a compulsive perfectionists” 🙂 , I took on different markers as I came across over the years in the hope of finding the perfect one with which I can settle with. Thus I have some different types of markers. I’m going to share with you my findings on them and hopefully it’s helpful to you.
The number one finding from searching the perfect marker is – no marker is perfect, no marker can do all jobs and fulfills all the purposes and with all good points. In fact I find what makes the marker work is often what could be the reason for the trouble they carry. For example the beautiful Sewline mechanical marker I have, it leaves the marking by being pressed down on the fabric. But pressing down hard may cause the marking not to be removed completely. This is the very reason I couldn’t use it for drawing a long line in a quick stroke which required a harder press and therefore scratched the fabric.
Another example is heat erasable markers – markings disappear with a certain level of heat, but can come back if it’s not been washed and the ait temperature is cold enough. Also if the storage condition is too hot, ink on the tip of the marker may dry which then blocks the ink flow. One of our clients shared that with me. She said even storing it close to a car heater outlet inside her car dried her marker up. So I’d suggest always testing on your fabric before using the marker as all manufactures say, and get the type of marker that suits the project you are working on.
The table I compiled below is based on my own experience and research. I hope it’s helpful for you. However, please feel free to drop a line for discussion 🙂 and I’d love to hear your experiences on markers.
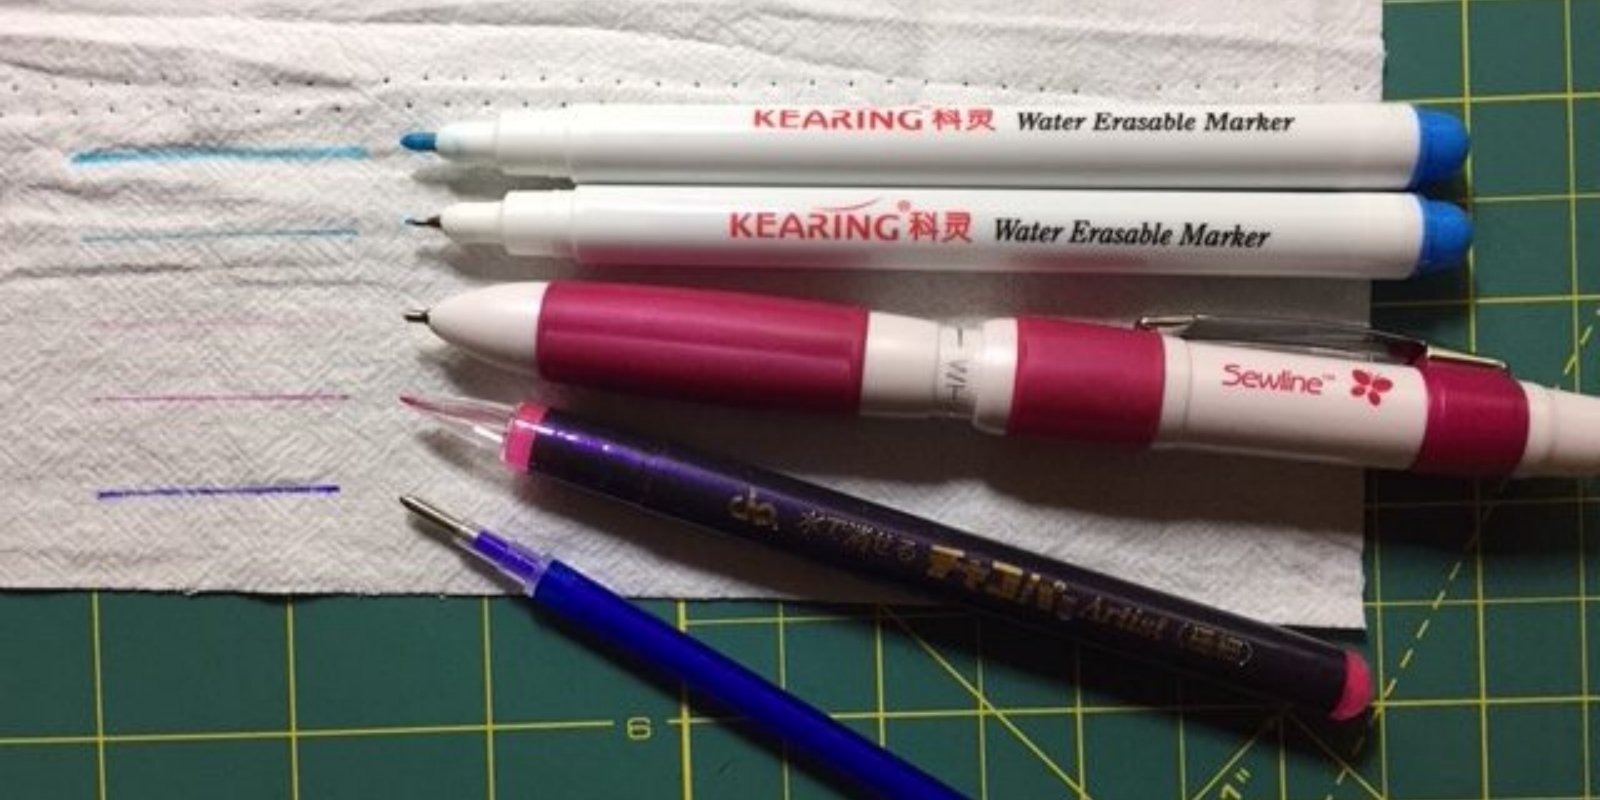
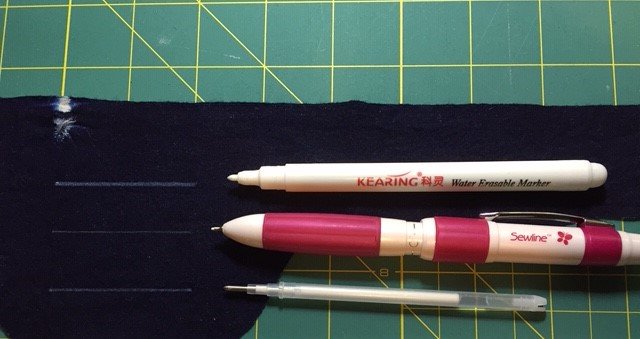
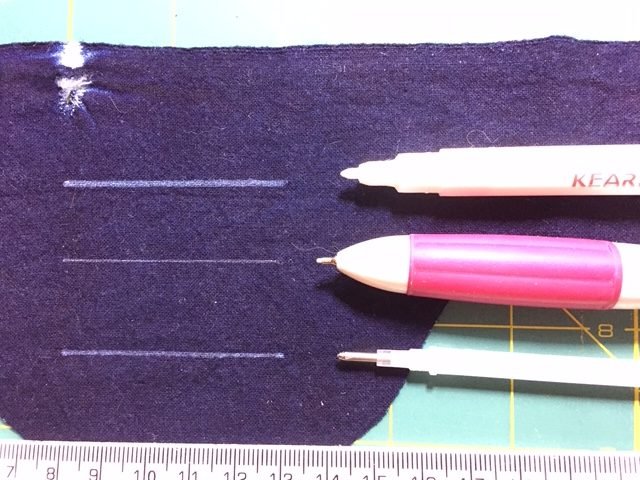
a close-up shows how fine and clear each marking is off 3 different markers
Marking on light fabric
from top to down – Kearing water erasable marker in 1mm tip and 0.5mm tip, Sewline mechanical marker, Cha super fine water erasable marker and heat erasable refill
Type of marker
mechnical
pencil
lead pencil
air erasable
marker
water erasable
marker
heat erasable
marker
hera marker
mechanism
0.9mm ceramic
leads coloured with water-soluble dyes. Marking is removed from most
fabrics using the in-built eraser, or by dabbing with a damp cloth or
washing.
lead leaves markings after drawing on fabric
specially formulated ink leaves marking on fabric through felted tip. Marking disappears without anything done with it. Time of disappearance of marking depends on type of fabric, weave of fabric, room condition etc.
specially formulated ink leaves marking on fabric through tip. Marking disappears with damp cloth or after wash.
specially formulated ink that is light activated leaves marking on fabric through tip. Marking disappears when ironing over 60 °C or after wash. However if not washed, marking can reappear when temperature is below -8 °C or lower depending on colour of ink.
a relatively “sharp” edge slides along fabric leave a pressed mark / crease in fabric.
Pros
Lead can be refilled. Can be
used on light or dark fabric. 0.9mm tip gives relatively fine marking line.
cheap and widely available
both thick head (1mm) and thin
(0.5mm) are available. No need to do anyting to remove marking ; marking is
clear and bold.
Cost is very reasonable if you shop around. marking stays until you remove it. Once washed, no markings left at all, very clean. Various colours available makes it can be used on both dark and light fabric. Both thick (1mm) and thin (0.5mm) are available making it easier for fine stitching project. Ink comes out easily without needing of pressing hard at all.
marking is clear and bold. Ink runs smoothly and easily. Both thick (1mm) and thin are available. Very affordable if you are happy with using just big refill (which is like a thin pen). Refills available.
no stains left on fabric
Cons
Most expensive relatively. Have to press down lightly when marking and have to remove marking before ironing or potentially marking cannot be removed completely. Because pressing down lightly, marking is light and vague, which can be rubbed off when working on fabric for a while. Also though it leaves marking easier than ordinarily pencils, it can still scratch fabric when trying to leave a mark.
can scratch fabric; marking
usually isn’t fine if using thick lead; markings possibly cannot be erased
completely if presed hard or too dark.
marking can go before you finish job; time to take for marking disappear varies – depends not only on fabric but also room conditions as well which makes it hard to estimate how long marking would stay without testing; haven’t seen marker on dark fabric.
if room moisture is high, marking can fade. On moisture absorbent fabric like linen, marking line is thicker.
Because they are light activated
there is a slight time delay in their appearance so wait for it. The brighter the available light in your
studio, the shorter the delay. Marking can be rubbed off before you finish work
if being rubbed too much; ink is very heat sensitive and tends to get dried
out if room condition is too hot or left aside for too long after use.
marking is essentially a fold on fabrics so it’s hard to see and if left too long, have to re-mark the fabric you work on
suitable for
all-rounder marker but not suitable for projects needs long marking lines or very textured fabric.
projects that can have marking
covered when finished and don’t need long marking lines.
projects need marking stays for only a short time.
embroidery projects. My favorite type 🙂
Projects need very clear
markings and don’t want to be washed afterwards and won’t go to places below
freezing point.
quilting purpose, applique
Brand tested
sewline
any student pencil
Adger
Kearing, Cha
Clover
clover
price
approx. $20/pencil
mostly less than $1/pencil
approx. $6/marker
from $4.5 /marker onward depends on which marker you choose and which shop you go to
approx $10.5/marker
approx $10/marker
For your convenience, markers are available via the link provided below. Blue markers are suitable for most fabric types, while brown markers are recommended for blue or grey fabrics.