What Fabric Marker to use?
There are so many markers out there and they all say they are good in one way or another. So, which one to use? And which one won’t cost me a fortune?
My first marker was a Sewline – a mechanical marker purchased years ago. It has many colors available on lead and marks fine lines plus it looks pretty itself. It went through a lot of projects with me until I took on a big applique quilt. When I used it to draw a long straight line for joining large applique pieces together, it started to scratch my fabric. So I bought my 2nd marker of Cha. Cha water erasable marker has a fine ceramic tip from which ink flows easily without effort and doesn’t bleed. That resolved the issue I had with drawing long lines.
As one of “a compulsive perfectionists” 🙂 , I took on different markers as I came across over the years in the hope of finding the perfect one with which I can settle with. Thus I have some different types of markers. I’m going to share with you my findings on them and hopefully it’s helpful to you.
The number one finding from searching the perfect marker is – no marker is perfect, no marker can do all jobs and fulfills all the purposes and with all good points. In fact I find what makes the marker work is often what could be the reason for the trouble they carry. For example the beautiful Sewline mechanical marker I have, it leaves the marking by being pressed down on the fabric. But pressing down hard may cause the marking not to be removed completely. This is the very reason I couldn’t use it for drawing a long line in a quick stroke which required a harder press and therefore scratched the fabric.
Another example is heat erasable markers – markings disappear with a certain level of heat, but can come back if it’s not been washed and the ait temperature is cold enough. Also if the storage condition is too hot, ink on the tip of the marker may dry which then blocks the ink flow. One of our clients shared that with me. She said even storing it close to a car heater outlet inside her car dried her marker up. So I’d suggest always testing on your fabric before using the marker as all manufactures say, and get the type of marker that suits the project you are working on.
The table I compiled below is based on my own experience and research. I hope it’s helpful for you. However, please feel free to drop a line for discussion 🙂 and I’d love to hear your experiences on markers.
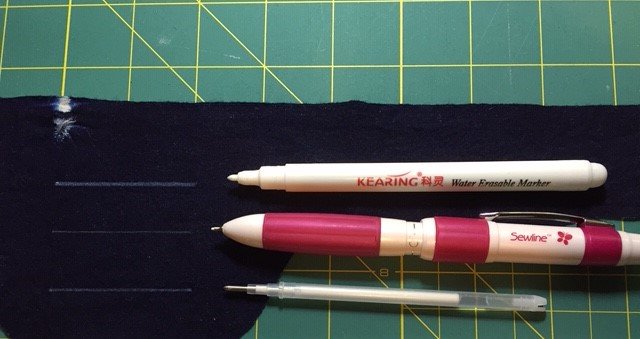
Marking on dark fabric
from top to down – Kearing water erasable marker, Sewline mechanical marker and heat erasable refil –
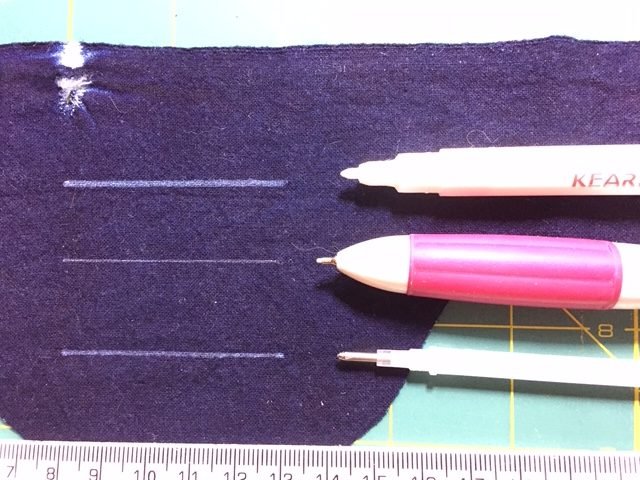
a close-up shows how fine and clear each marking is off 3 different markers
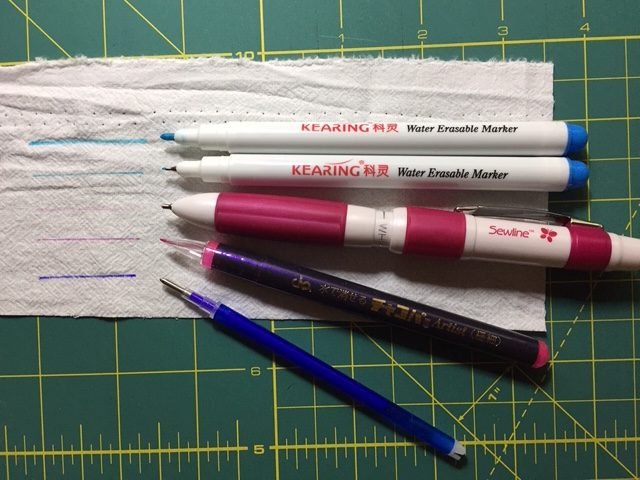
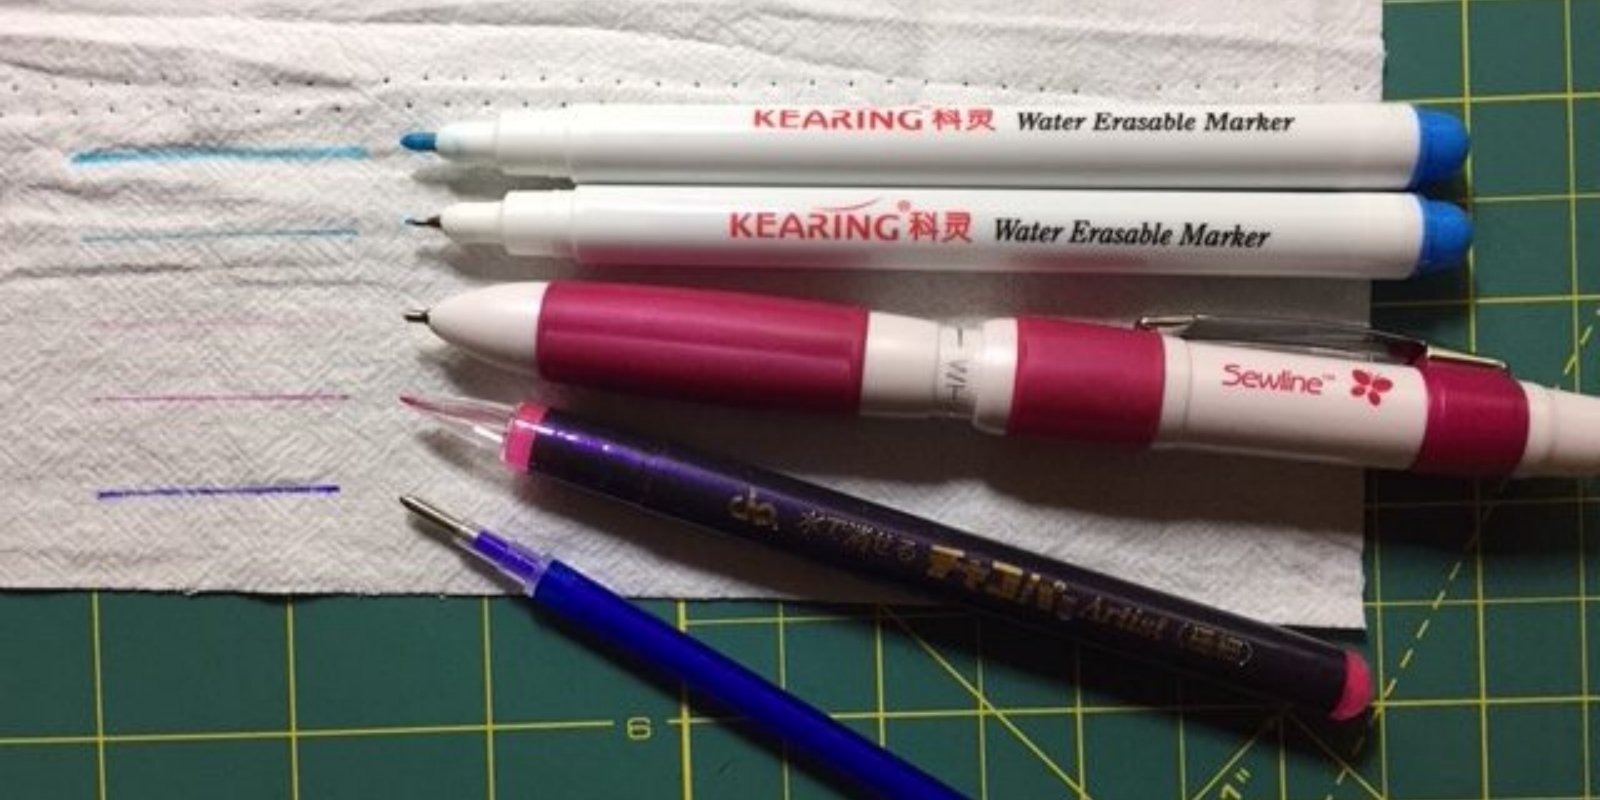
Marking on light fabric
from top to down – Kearing water erasable marker in 1mm tip and 0.5mm tip, Sewline mechanical marker, Cha super fine water erasable marker and heat erasable refill
| Type of marker | mechnical pencil | lead pencil | air erasable marker | water erasable marker | heat erasable marker | hera marker |
| mechanism | 0.9mm ceramic leads coloured with water-soluble dyes. Marking is removed from most fabrics using the in-built eraser, or by dabbing with a damp cloth or washing. | lead leaves markings after drawing on fabric | specially formulated ink leaves marking on fabric through felted tip. Marking disappears without anything done with it. Time of disappearance of marking depends on type of fabric, weave of fabric, room condition etc. | specially formulated ink leaves marking on fabric through tip. Marking disappears with damp cloth or after wash. | specially formulated ink that is light activated leaves marking on fabric through tip. Marking disappears when ironing over 60 °C or after wash. However if not washed, marking can reappear when temperature is below -8 °C or lower depending on colour of ink. | a relatively “sharp” edge slides along fabric leave a pressed mark / crease in fabric. |
| Pros | Lead can be refilled. Can be used on light or dark fabric. 0.9mm tip gives relatively fine marking line. | cheap and widely available | both thick head (1mm) and thin (0.5mm) are available. No need to do anyting to remove marking ; marking is clear and bold. | Cost is very reasonable if you shop around. marking stays until you remove it. Once washed, no markings left at all, very clean. Various colours available makes it can be used on both dark and light fabric. Both thick (1mm) and thin (0.5mm) are available making it easier for fine stitching project. Ink comes out easily without needing of pressing hard at all. | marking is clear and bold. Ink runs smoothly and easily. Both thick (1mm) and thin are available. Very affordable if you are happy with using just big refill (which is like a thin pen). Refills available. | no stains left on fabric |
| Cons | Most expensive relatively. Have to press down lightly when marking and have to remove marking before ironing or potentially marking cannot be removed completely. Because pressing down lightly, marking is light and vague, which can be rubbed off when working on fabric for a while. Also though it leaves marking easier than ordinarily pencils, it can still scratch fabric when trying to leave a mark. | can scratch fabric; marking usually isn’t fine if using thick lead; markings possibly cannot be erased completely if presed hard or too dark. | marking can go before you finish job; time to take for marking disappear varies – depends not only on fabric but also room conditions as well which makes it hard to estimate how long marking would stay without testing; haven’t seen marker on dark fabric. | if room moisture is high, marking can fade. On moisture absorbent fabric like linen, marking line is thicker. | Because they are light activated there is a slight time delay in their appearance so wait for it. The brighter the available light in your studio, the shorter the delay. Marking can be rubbed off before you finish work if being rubbed too much; ink is very heat sensitive and tends to get dried out if room condition is too hot or left aside for too long after use. | marking is essentially a fold on fabrics so it’s hard to see and if left too long, have to re-mark the fabric you work on |
| suitable for | all-rounder marker but not suitable for projects needs long marking lines or very textured fabric. | projects that can have marking covered when finished and don’t need long marking lines. | projects need marking stays for only a short time. | embroidery projects. My favorite type 🙂 | Projects need very clear markings and don’t want to be washed afterwards and won’t go to places below freezing point. | quilting purpose, applique |
| Brand tested | sewline | any student pencil | Adger | Kearing, Cha | Clover | clover |
| price | approx. $20/pencil | mostly less than $1/pencil | approx. $6/marker | from $4.5 /marker onward depends on which marker you choose and which shop you go to | approx $10.5/marker | approx $10/marker |
For your convenience, markers are available via the link provided below. Blue markers are suitable for most fabric types, while brown markers are recommended for blue or grey fabrics.